Carrots are 0 points raw; 1 point for a cup if they're cooked.
Vegetables have a Weight Watchers "points" value that ranges from 0 to 3 points per serving, depending on a particular vegetable's calories and fiber content. (Fresh vegetables do not contain fat, the third piece of the equation that Weight Watchers uses to assign point values to foods.) Determining the point value of various vegetables does not have to be expensive or tricky.
Step 1
Understand what counts as a serving. For leafy vegetables (spinach, lettuce) 1 cup is a serving. For other vegetables, a half cup counts as a serving. For frozen and canned medleys and blends, refer to the nutrition label.
Step 2
Learn how to read the nutrition label on the back of frozen and canned vegetables. Key information is the number of calories, fat grams and fiber grams per serving—and the number of servings per container. In general, the fewer the calories and the higher the fiber, the lower the point value.
Step 3
Use the mathematical formula Weight Watchers uses to determine a food's point value. The equation involves three steps: Divide the number of calories by 50. Then, divide the number of fat grams by 12. Add those numbers together. Then figure which is less: the amount of fiber or the number 4. Take whichever is less and divide that number by 5. Take the calories-and-fat number and subtract from it the fiber number to get the "points" value, which is rounded to the nearest whole or half number.
Step 4
Purchase a food companion booklet or "Pointsfinder" calculator from Weight Watchers, or an iPhone application that includes point values for vegetables—and keep them readily available.
Step 5
Learn which vegetables are zero points, so you will not need to calculate them. They include asparagus, beets, broccoli, Brussels sprouts, cabbage, raw carrots, cauliflower, celery, cucumber, eggplant, endive, escarole, green or wax beans, greens, hearts of palm, jicama, lettuce, mixed green salad, mushrooms, okra, peppers, unsweetened pickles, pimientos, fresh pumpkin, radishes, sauerkraut, scallions, spinach, sprouts, spaghetti squash, summer squash, tomatoes, turnips, watercress and zucchini squash.
Step 6
Memorize which of your favorite vegetables do have "points" values. Some examples:
One point: 1 cup each of artichoke hearts, cooked carrots, cooked onion, snow peas and winter squash.
Two points: ¼ cup avocado, ½ cup chickpeas or mashed potatoes, 1 cup corn, cooked parsnips or green peas.
Three points: ½ cup marinated mushrooms, or one 5-inch sweet potato or yam.
Warning
The zero-point vegetables are zero points only if you eat them without adding butter or sauces.
In case you consider ketchup a vegetable—it is made with tomatoes, after all—be aware that ¼ cup is worth 1 point.
Potatoes are a vegetable, but their variations can be high-point food choices for Weight Watchers. Some examples: a stuffed baked potato is about 10 points; a medium serving of French fries is six points; ½ cup of potato salad is seven points; just 1 oz. of potato chips is four points.
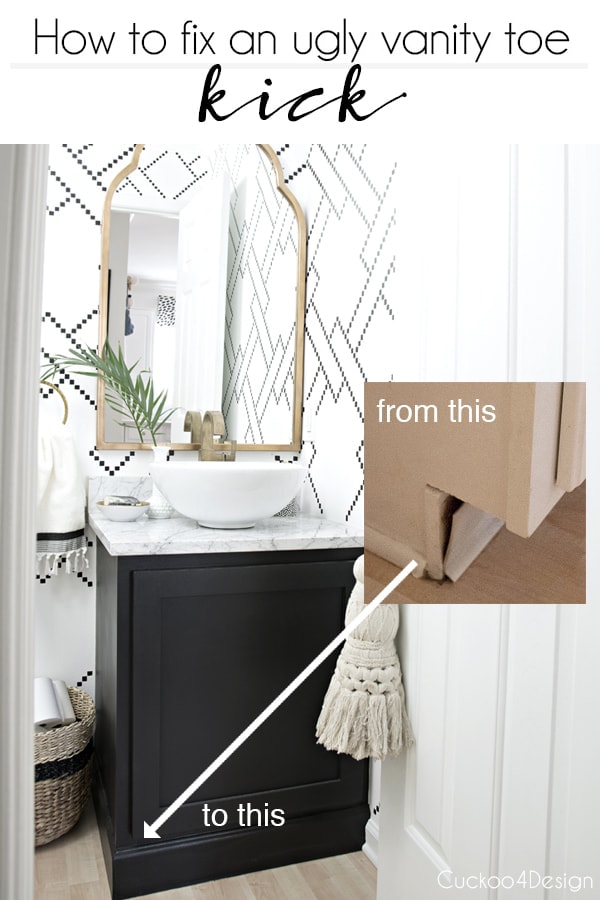
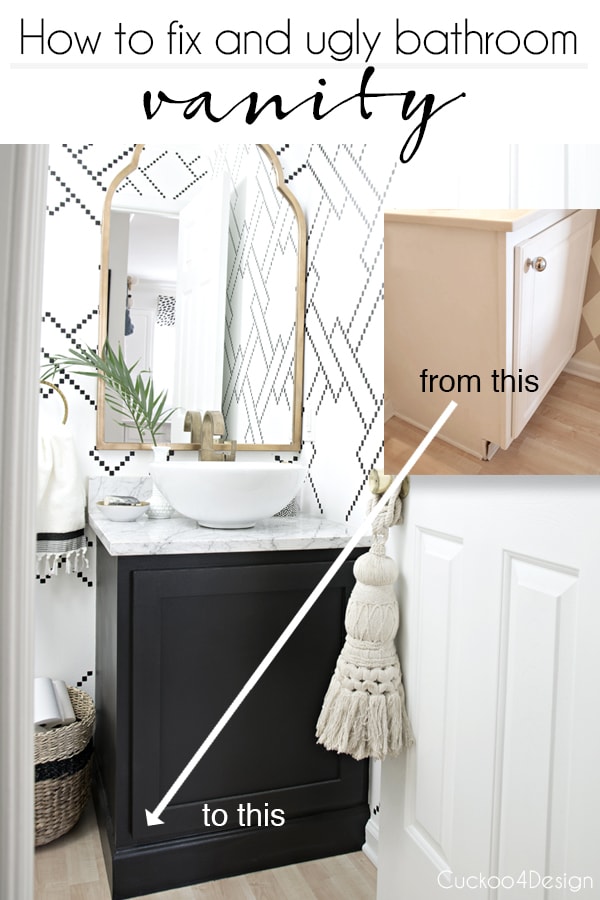
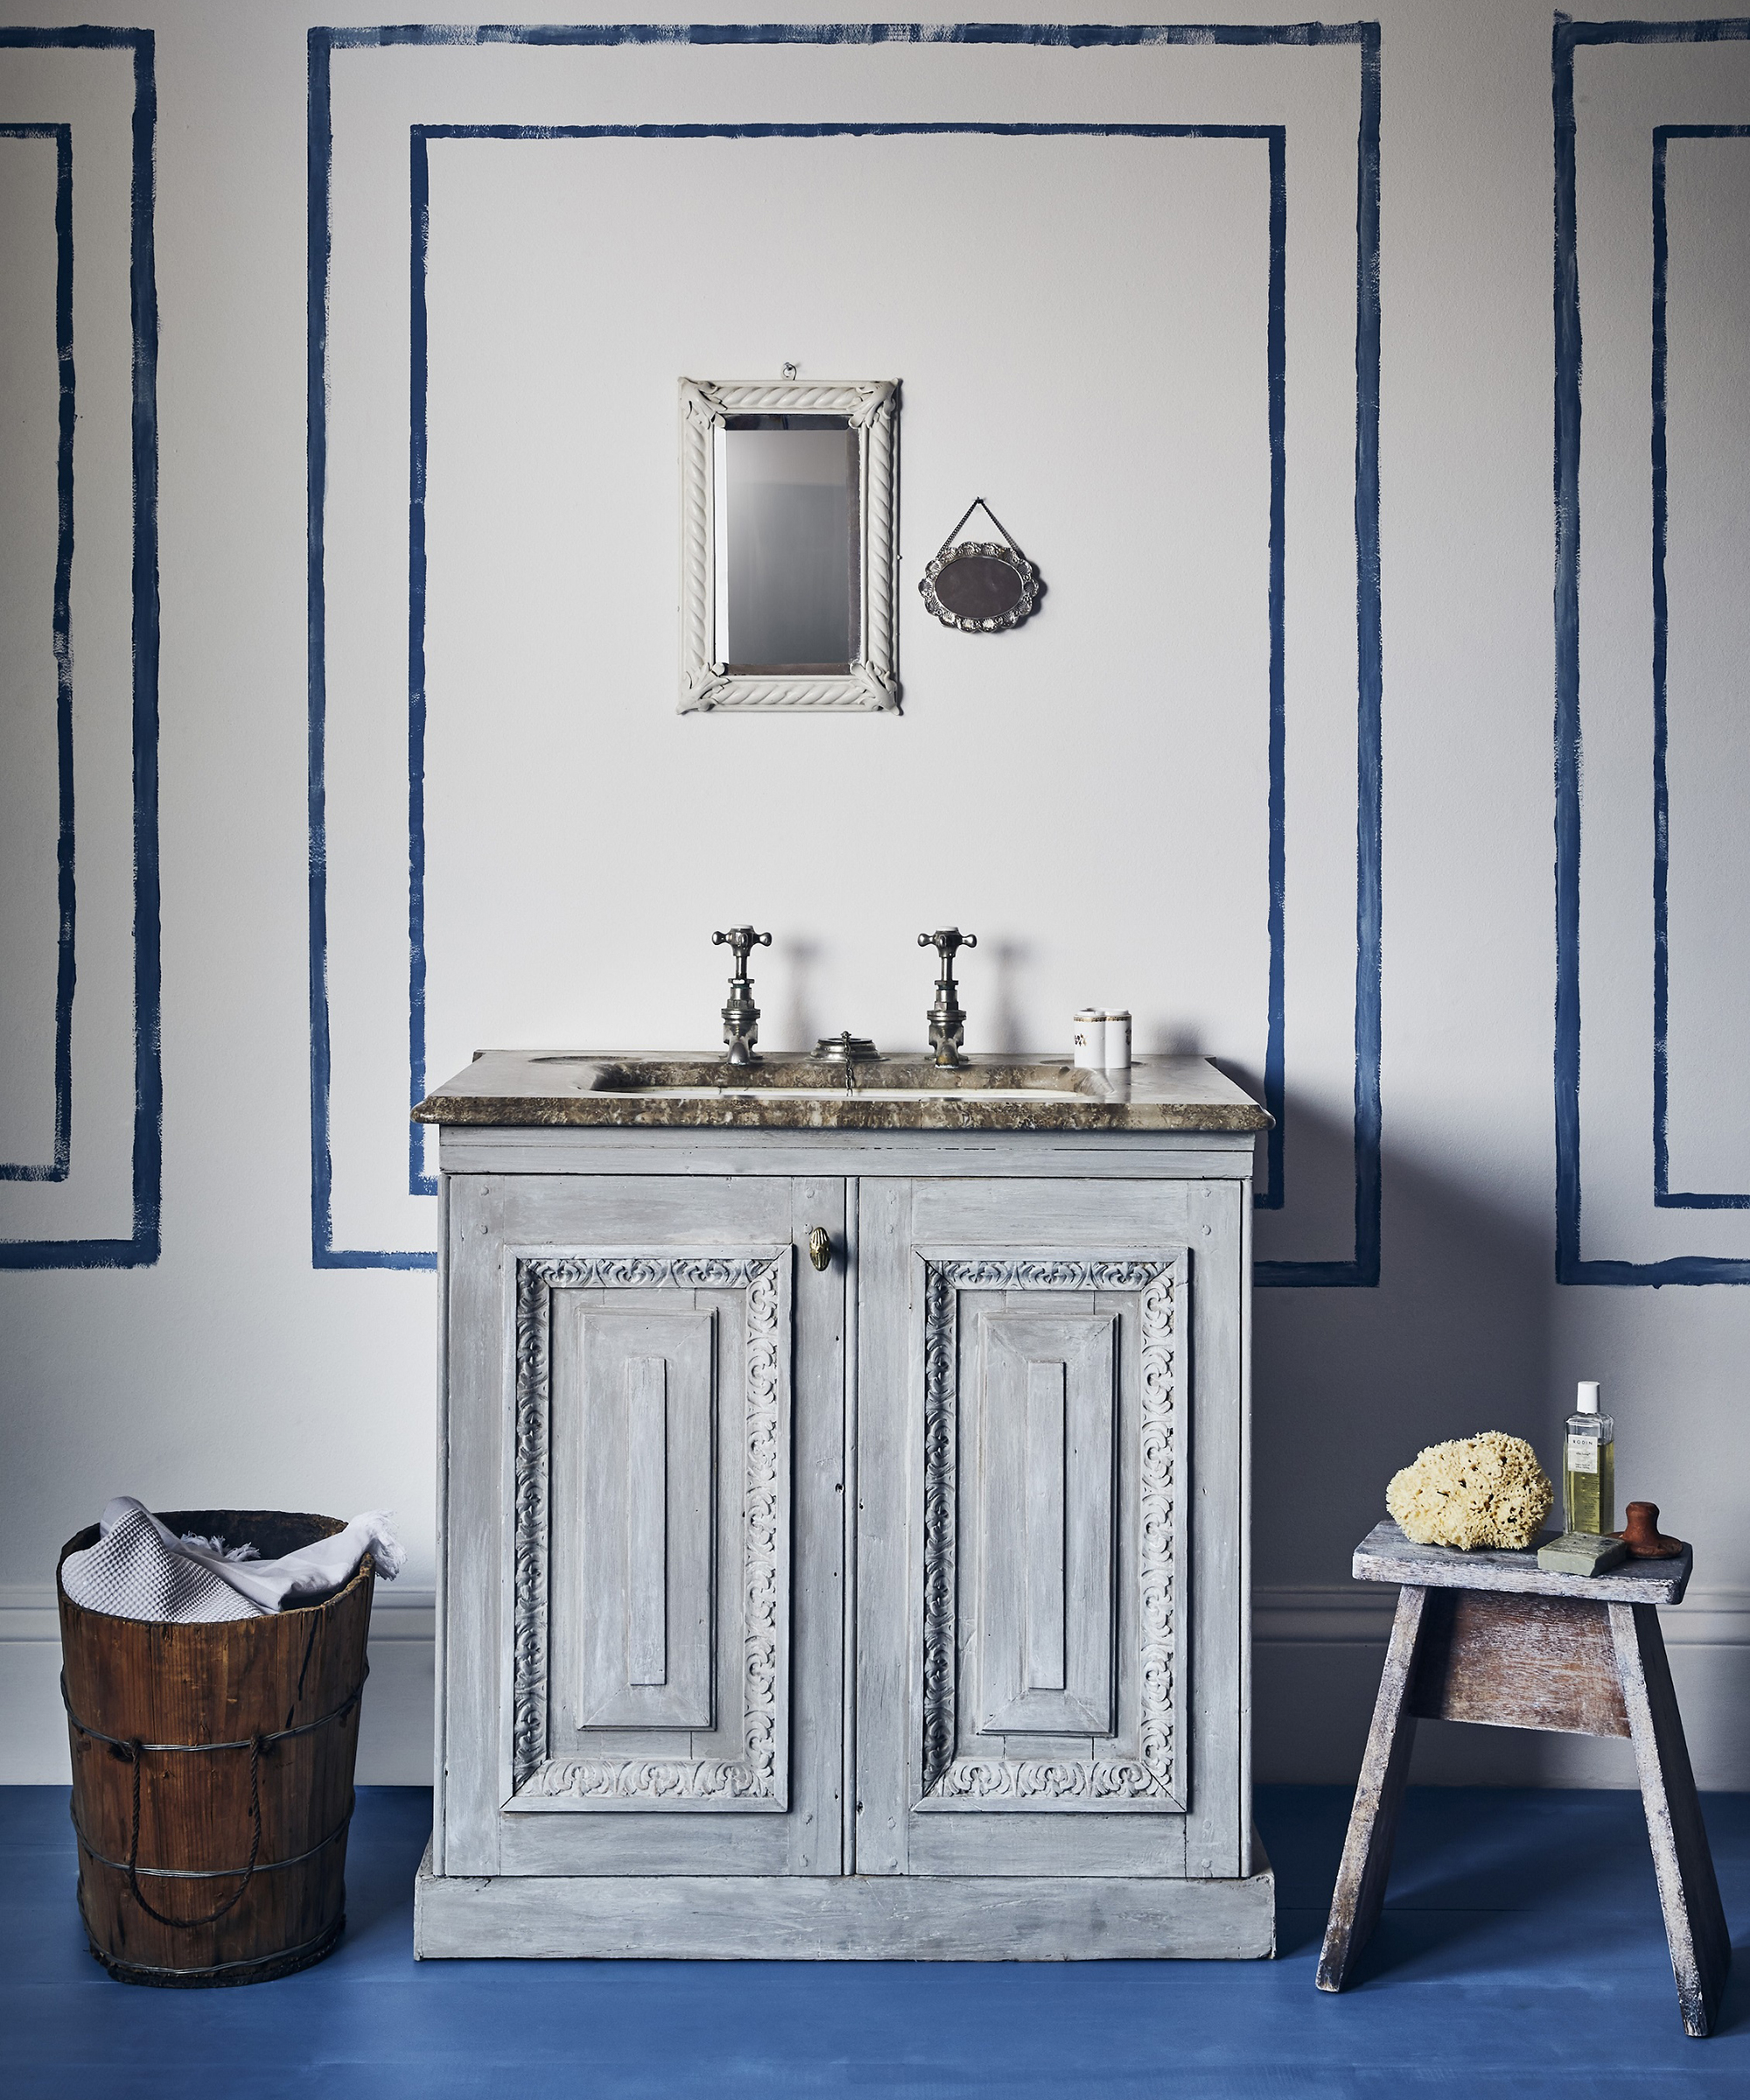
I finally tackled the ugly vinyl cabinet kick plate in our bathroom. While a kick plate or toe kick serves a purpose, especially in the kitchen, I'm not thrilled about the kitchen cabinet look in my bathrooms. I wanted the vanity to look more like a custom piece of furniture, so I decided to rip the vinyl off and build the bottom out, to give the vanity the look of a dresser or built-in piece of furniture. (Also see my other posts about how to update cabinets HERE and HERE)
Let me walk you through what I did to my vanity toe kick.
Cabinet Kick Plate Makeover with Molding
This post may contain affiliate links from which I will earn a commission at no extra cost to you. View my full disclosure policy.
Here is what the builder standard cabinet looked like before the makeover. I really dislike the cheap looking piece of vinyl the builder glued to the cabinet toe kick.
When I removed the vinyl toe kick, this is what I was left with. A hardened glue mess. Yuck!
Supplies needed for the cabinet kick plate makeover
interior 2×4 lumber (one piece)
liquid nails (HERE)
coping saw(click HERE)
pencil
measuring tape
miter saw (I have an electrical one but a hand miter saw works too)
doorjam undercut saw (click HERE)
drill and small drill bit
finishing nails
hammer
paintable caulk (HERE)
decorative molding in the same height as the toe kick of the vanity – make sure to measure your vanity! (I like buying my molding at Home Depot because they let you cut the molding to the size you need and don't make you buy a large piece)
Project instructions
When I thought about how I wanted to tackle this little makeover, I noticed that the depth of the toe kick notch-out fit two 2x4s exactly. See the below photos:
If you are a professional wood-worker, please don't cringe, cry or ram your head against a wall. I know this isn't what you would do. So you probably should just move on since I'm just some stay-at-home-mommy doing my thing. Ok? No hurt feelings 😉 The end result looks great though.
So I attached them with liquid nails. Sometimes I just prefer using that magical glue. I didn't want to use too much force attaching them with nails or screws. It worked great!
Can you also see that I cut the little white piece that stuck out on the side with a doorjam undercut saw (click HERE). I only had to protect the side of the cabinet with a towel.
Then I moved to cutting out the side molding. And yes I could have (or maybe should have) removed the wall molding and cut that to size instead of doing it the way that I did it but for me it was easier this way. And I can't remove the vanity since the floor was built around it. So if we ever do something different in this powder room, it will have to be a total removal of everything anyway.
I marked the profile onto my molding.
And then I used a coping saw(click HERE) to cut out the shape. This sounds harder than it actually is. I have used the coping saw before for when I put up our crown molding. A coping saw is pretty easy to use and maneuver to cut out a profile on molding.
Here is what the piece looked like after.
I had to do this twice for both sides of the vanity that meet the wall molding.
Then I moved on to cutting the two 45 degree angles that you can see in the below photo that meet on the corner of the cabinet. I used my power miter saw but you can use a hand saw too which works pretty easy.
To attach the toe kick molding to the vanity, I had to pre-drill holes on the molding for the finishing nails, then hammered the nails in and caulked all the small gaps.
After that I primed the molding one more time, even tough I bought primed base molding.
And two coats of white paint and voila here is the vanity after in white.
I also painted the walls with a cheap sharpie treatment click HERE and HERE to see more.
But to see the below finished black and white bathroom the way it is picture below, you can click HERE and HERE to see what else I did.
Don't you think the vanity looks much better without the cabinet kick plate? And it didn't cost much at all.
Trusted Aesthetics in the Bathroom Advice, Property washroom tips, Home design guide
Aesthetics in the Bathroom
20 Feb 2020
Aesthetics in the Bathroom Design Guide
In the past, the bathroom was often thought of as a more functional space. Nowadays, you can consider your bathroom as an important feature room in your house and a space where you can impress your guests. Afterall, even if you don't give them a tour of your house, chances are they will end up there anyway.
The bathroom is an important room in the house. Think about the amount of time we shower and bathe in there too? I wonder how many famous ideas started off in the shower or the bath?
Essentially all were saying is, the bathroom is an integral and important room in the house.
With a brilliant range of materials and bathroom furniture like shower wall panels to choose from it is the perfect room to display your personality and show your creative flare.
Even if you do not want to redesign your whole bathroom, just a few simple changes to the bathrooms design can transform this room into the wonderful calming space you desire.
And if you're limited by space, don't worry. There are a few tips that can be used in even the smallest of bathrooms to make this room into an eye-catching feature that will be the talking point of all of your friends.
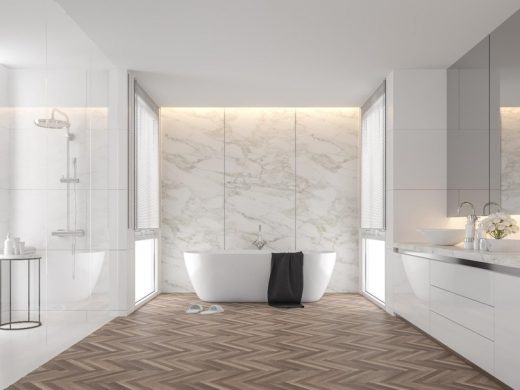
A Minimalist Bathroom Design
There are many incredible bathroom aesthetics that can be used to create the perfect minimalist styled room that will provide the ultimate luxurious feel and result in an amazing space that will leave guests speechless.
A minimalist bathroom is produced as the result of being able to declutter your bathroom space. So to achieve this, it is essential that you are able to find effective storage solutions.
The use of sleek shiny bathroom vanity units are the perfect solution to every person's storage needs, as it allows toiletries to be kept out of sight and results in an inviting bright functional space. Your personality can still be added to these amazing bathrooms by the inclusion of special personal details, such as flowers or plants that will add individual character.
Check out Bella Bathrooms as they have a great selection of vanity units at an affordable price.
There are many different options for creating a minimalist look but a popular choice is to use sharp clean lines to emphasise the resulting space. The clever use of a light marble feature wall fits perfectly with the smart white bathroom furniture and reflects the light to highlight the amazing space that this bathroom provides.
The marble colour effect is also perfect for adding a pattern of unpredictable colour that enhances the straightforward lines of the rest of the bathroom. This effect is also perfect for using alongside any plain coloured units, as it will inject exciting character into the room. Marble gives a smart feel to every bathroom, so along with being easy to keep clean, it is the perfect material to include when you are looking to achieve that professional finish.
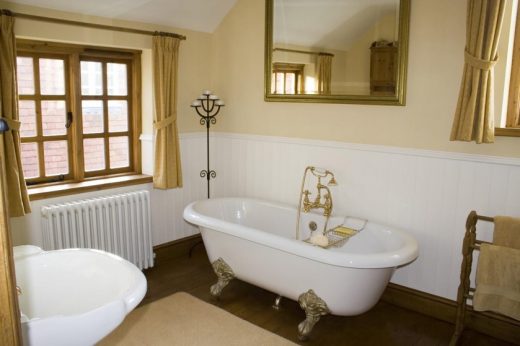
Traditional Bathroom Aesthetics
The classic styled bathroom with a traditional freestanding bathtub and sink units may not be for everyone but it does make a lovely bathroom feature with a stylish finish. This style allows the décor to be kept simple as it is the fabulous small details that really make this a special bathroom.
You will require quite a large space to pull this off but if you can it's well worth it.
When looking for bathroom units that have these incredible aesthetic features you will not be able to beat these traditional freestanding baths. The gold plated feet have wonderful intricate detail that really set this style bathroom apart from other more modern styles and to finish off the room the beautiful classic style gold taps will certainly attract the attention of your guests.
Traditional bathrooms are great for providing an instant luxurious feel and often the bathroom units have softer and more rounded lines to provide a unique and calm feel. The great benefit of the classic bathroom design is that any bathroom can be transformed to give a traditional feel. You can keep the design simple by changing just the bathroom units or for a bigger renovation can incorporate changing the rest of the décor to create a stunning feature.
Attention to detail is key to make the most of the traditional design, as small details such as a classic radiator can really set the tone of the room. Combine this beautiful bathroom with a wonderful wooden towel rail and metal candle stand and you will have created the perfect traditional bathroom. There are many wonderful extra details that you can add to these rooms, from light fittings to bathroom accessories, so you will be certain to create a fabulous unique design.
Over recent years the traditional style bathroom has made a comeback as people enjoy the extra space that the freestanding bath provides and they love the simplistic feel that these rooms can give. So this will ensure that your newly designed bathroom will be the talking point of all of your friends.
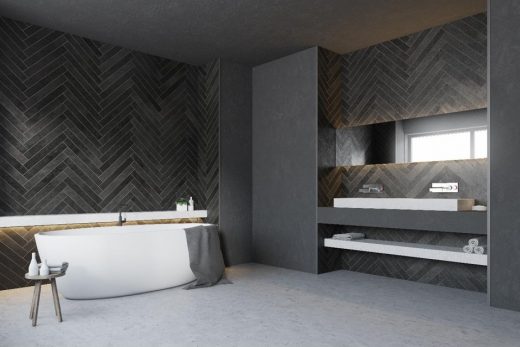
The Monochrome Style
The use of black features in your bathroom may not be a colour that you would have chosen to use first. However, you can create an incredible space with the clever use of a monochrome colour palette. When used correctly, these simple colours can create a sophisticated space and modern feel to your bathroom.
It is an easy effect to achieve with the use of black tiles for the walls and a contrasting white bathroom suite to finish off the look. This monochrome effect is a bathroom design that is quickly gaining popularity, so is sure to create the perfect bathroom feature that is an ideal selling point if you are looking to move house.
The only limitation of the use of these stunning black colours is that you need sufficient space and light in your bathroom to enhance the monochrome effect but a careful design will allow this monochrome feature to be successfully achieved in the majority of bathrooms. For example, the use of a cleverly placed mirror can make all the difference to the overall finish of your bathroom.
If you enjoy the modern effect of clean straight lines then you will love the finish of black tiles that meet at perpendicular angles for an unusual but appealing feel. The use of white grout will give the perfect contrasting finish to the walls of this stunning bathroom that can easily be incorporated into your new bathroom design. For maximum effect the use of light coloured floor can make the most of the space available in your bathroom to really make this design work for you. The monochrome bathroom is a surprisingly easy effect to achieve and will give impressive results in every bathroom.
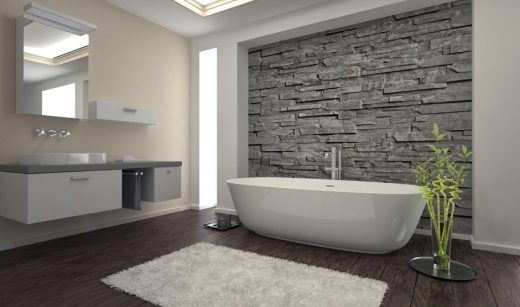
Making the Most of Natural Features
If you are looking for a simple way to create a statement feature in your bathroom then uncovering the hidden brickwork behind the plaster on your walls can be a cheap way of transforming your bathroom, while also giving it a beautiful natural feel. By exposing even the commonly used plain red bricks can have a stunning effect on any bathroom. The use of a brick wall can easily introduce the appealing brick effect pattern with its predictable straight lines, while also making use of the bricks natural colours to provide a welcome splash of colour.
For that extra special character then you can go one step further and consider the addition of a natural stone wall that is perfect for even the most minimalist bathroom styles. The soft grey colour of this spectacular wall has a wonderful calming characteristic that is ideal for every busy household, while the texture effect of the clever brickwork provides a unique feel that will mesmerise guests.
The unpredictable shape of the stones that are incorporated into the wall compliment the sharp straight line features of any modern bathroom. The appeal of this fantastic feature wall is that you are not limited to décor ideas or furniture options if you choose this wall for your bathroom. It really is a versatile feature that can be used in every bathroom to give that extra special touch.
You do not have to be limited to stone or brick wall features as the bolder designers will be rewarded for considering a wooden wall to provide a unique stunning feature. Wood provides a warm addition of colour, making it the perfect addition to all bathrooms no matter what the décor or colour scheme is. It will brighten up every space and provide special character to every room while often providing softer lines from the usual straight lines of the exposed brick wall. This idea is certainly going to increase in popularity as people see the wonderful results that this feature wall produces.
The Wood Effect
Often when designing bathrooms the use of wood as a bathroom feature can be overlooked for more commonly used materials. However, if you are looking to create a truly unique and stunning room then you should consider this amazing material. There are a number of ways that you can include wood in your bathroom design, so you can choose a simple feature or even try a creative work of art.
Alongside the previously mentioned wood feature wall there is also the option to use a natural wood floor or even wood units to add that all important character to a room. Wooden bathroom furniture can be added to every bathroom as it will match most colour schemes while adding a soft tone of colour to bathrooms that may lack colour.
These wooden pieces are sturdy and practical and can make great long lasting units for every bathroom. They also make the perfect storage units for those who are looking to create a minimalist bathroom while also providing unique character allowing all wooden features to also fit seamlessly into a traditional bathroom. These lovely wooden features are truly versatile so will make a stunning addition to every bathroom.
Adding Mosaic Tiles to Every Bathroom
If you are looking for ways to add personality to your bathroom then tiles are the perfect way to achieve this, as you are unlimited with the patterns and colour combinations that you can add. It may be that you want to use these wonderful mosaic tiles as part of a small feature wall or you might want to be bold and use them on your walls and floor. There really is no limit to the finished result when designing the bathroom décor using mosaic tiles.
Along with being practical and easy to clean, these mosaic tiles are a popular addition to many modern bathrooms due to the unique finish that these tiles guarantee. It is an easy way to incorporate a chosen colour and brighten up a plain bathroom or they can be used to really make a statement. The brilliance of using mosaic tiles is that they can be used in every bathroom space no matter how big or small.
Mosaic tiles are perfect for creating sharp straight lines with a strong regular pattern that will make your bathroom stand out. This is great for complimenting other straight line features that you may have in your bathroom but it will also contrast any smoother rounded lines making it a versatile pattern that can be used in every bathroom. The fantastic result of combining lighter and darker mosaic colours together can create a stunning effect that reflects the light to make the most of every bathroom space. Mosaics are a great option for everyone who is considering a bathroom renovation.
Comments on this guide to Aesthetics in the Bathroom article are welcome.
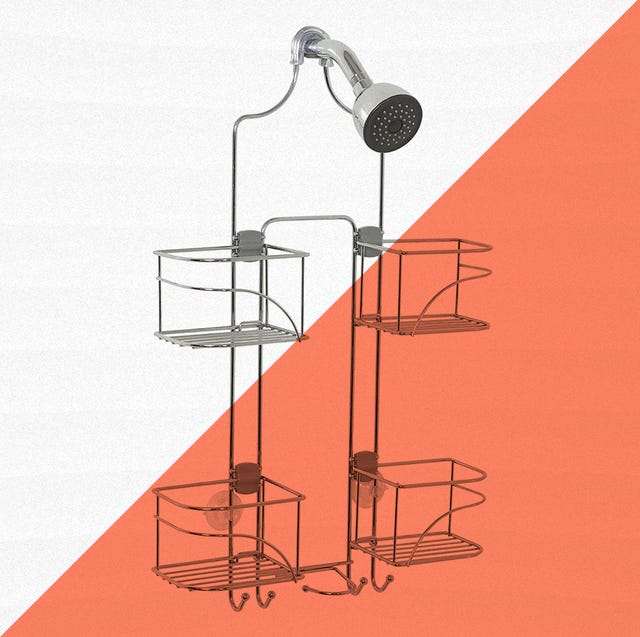
Even the roomiest bathrooms can feel oppressive when your shower gear is disorganized. Shower organizers keep all of your shampoo bottles, conditioners, bath soaps, scrubs, razors and shaving lotions in one place. Shower organizers are especially essential if multiple people are sharing a bathroom: You know where your gear is, but it also ensures your stuff doesn't take over another person's precious shelf space.
What to Consider
A shower organizer seems like a minor purchase, but it's something you'll be using every day. If you want to end up with a more organized morning routine, keep these few things in mind, and your day will be off to a much better start.
Shower organizers can be suspended from showerheads, mounted on walls, hung from doors or shower curtains, even rest on the floor or be attached to a corner wall. Think carefully about what will work best for your space.If you have a larger family using the organizer, you might want to consider a pole caddy that stands in the corner of the shower. They normally have about four shelves and don't take up too much space. For smaller families, a hanging caddy can do the trick. Finally, consider how important having a place for your razor, bar of soap and shampoo bottles is. Some organizers are designed with a specific focus in mind, and make sure it suits your needs.
How We Selected
We tracked down hundreds of shower caddies, focusing on classic set-ups, including the over-the-showerhead and pole-style design. We considered both professional assessments and consumer reviews, and sought out products from well-established companies with excellent reputations for customer service. A shower caddy may not seem like a big deal, but when you find one that suits you, it can transform your morning routine.
1
Best Pole Splurge
OXO Good Grips Pole Caddy
This rustproof anodized aluminum pole caddy fits into a shower corner and extends from 5 to 9 feet. This caddy is sturdy and easy to install, with a single connection that locks it into place.
The four shelves hold a lot of gear, and are removable, which makes cleaning a lot easier. The shelves also have holes so you can store bottles upside down. This caddy does not come cheap, but it carries a lifetime guarantee against rust or breakage.
Reviewers say it is "an outstanding product in every way," and "the installation requires no tools."
2
Best Bargain Pole
ADOVEL Corner Shower Caddy
This stainless steel rustproof corner caddy is easy to assemble, and adjusts to between 4.5 and 9 feet. The caddy features four removable shelves with patented drain design, so they don't become water-logged. There's also a hook to hang your washcloth on.
Reviewers say the "materials are good quality," and that installation took about "10 minutes." One raved that the caddy "helps organize everything, and is way better than any of the ones with suction cup attachments."
3
Best Bottle-Focused Caddy
Verona Metal Wire Hanging Caddy
iDesignamazon.com
$27.35
If your shower gear tends to come in bottle form, this caddy is for you. The over-the-showerhead caddy features six angled bottle shelves, two storage shelves and four hanging hooks to keep all of your showering amenities at your fingertips.
This 25-inch tall iDesign caddy is made with durable steel. The installation is a breeze—no mounting or hardware required.
Reviewers who have a lot of bottles say it's a "really great investment" and the only one they could find where "the bottles don't fall out." Some do advise buyers to purchase the additional suction cups, as it makes the caddy more stable and secure.
4
Best Over-the-Door Option
Meal Over-Door Shower Organizer
mDesignamazon.com
$23.99
This over-the-door shower organizer makes keeping essentials close at hand simple. The vintage-inspired design features two shelf baskets, four smaller hooks and razor holders, two larger hooks, and an open grid design that encourages water drainage and air circulation to prevent mold and mildew.
The installation is easy, featuring a simple hang model with section cups for added security. The 21.6-inch high caddy is made from steel, with a rust-resistant finish. Reviewers praise this "smaller sized" shower caddy that "comes assembled and doesn't take up too much space."
5
Best Overall
OXO Good Grips 3-Tier Caddy
This straight-forward shower caddy does exactly what it's designed to do. It has enough capacity to hold shower accoutrements for two people, it features a removable soap dish with a built-in razor holder for easy cleaning, it can be hooked over the shower head and is more stable than many other caddies thanks to the wall-hugging suction cups located at the bottom, and it is made from durable, high-quality materials that won't break down after a year or two.
Reviewers love its "beautiful, modern and sleek look," which "fits my shower perfectly."
6
Best Budget
MAYTEX Quick Dry Mesh Organizer
This super-budget organizer is a great fit for people with limited shower space. The mesh pockets organizer can be used inside or outside the tub to organize soaps, shampoos, razors and toys. It pairs best with O Ring Shower Curtain rings, and can be hung with an existing curtain or liner.
Reviewers caution to not load more than one pound's worth of items into a pocket, but say "the stitching and mesh are both high-quality," and the organizer "is so useful!"
7
Best Loved
Adjustable Shower Caddy
simplehumanamazon.com
$49.99
This caddy has an average of 4.7 stars on Amazon from more than 7,575 users. The hang-over-the-showerhead Simplehuman caddy features completely adjustable shelves that can be moved up, down and sideways to accommodate bottles of different sizes and shapes; the quick-dry soap dish drains out water. The organizer is made from rustproof stainless steel and anodized aluminum.
Reviewers love that the caddy fits "the newer models of razors" and "bulk-buy shampoos." One summarized their bliss writing, "it is everything shower organizers should be."
8
Best Floor Model
Corner Shower Caddy
simplehumanamazon.com
$79.99
If you don't want to fuss around with a mounted caddy, this floor model is a wonderful option.
The Simplehuman caddy has adjustable feet to ensure stability on slipper and uneven floors, and features two adjustable shelves for bottles of different sizes. The organizer features a five-year warranty and is made from rustproof aluminum and stainless steel. The 30.5-inch-high caddy also has two storage hooks for razors and washcloths.
Reviewers say it is "very well made" and "worth the extra bucks to purchase a quality caddy."
9
Most Versatile
Expandable Over-the-Showerhead Caddy
Zenna Homeamazon.com
$24.99
This nice-looking shower caddy has clean lines and installs easily. The Zenna organizer is designed to work on all types of showerheads, including handheld shower hoses, and features a non-slip collar so it stays in place. It also features four baskets that slide, so you can customize the spacing to accommodate tall bottles. The caddy is made of steel with a chrome finish, so it resists rust. Some reviewers complain that there's no holder for bar soap, but praise its "secure" fit over the showerhead and overall "affordability."
10
Best Wall-Mounted Organizer
Wall-Mounted Shower Caddy
Vidan Home Solutionsamazon.com
$36.99
The Vidan shower caddy is your best bet if you have your heart set on a wall-mounted caddy. Organizers that mount to the wall are notorious for either requiring drilling, holes and tools to install them, or for not sticking. But this one is easy to install, and adhere to non-porous, smooth and glossy surfaces such as glazed ceramic and tile, glass or mirrors. This 15.2-inch-tall stainless steel shower caddy is rustproof, and features a roomy two tiers of shelves with hooks to accommodate bottles, bar soap, razors and other showering accessories. Reviewers say this caddy "is worth the money" and "it holds, no problem!"
Kathleen WillcoxKathleen Willcox is a journalist who writes about parenting, technology, shopping, food and wine.
This content is created and maintained by a third party, and imported onto this page to help users provide their email addresses. You may be able to find more information about this and similar content at piano.io
From interior design shows to celeb bathroom remodels seen on Instagram, the media is awash with inspirational spa-like spaces – including some incredible bathrooms on a budget.
Because the good news is that, no matter what you have to spend, most bathroom ideas are still achievable. Thanks to lookalike surfaces, and clever DIY hacks, you can still pay homage to the hottest interior design trends without needing to hire in a contractor.
We have pulled together a list of budget bathroom know-how, some ideas we have cost under $50/£50, some under $100/£100 and some under $500/£500. You will then find some more practical advice if you are designing a bathroom from scratch and looking for budget-friendly tips.
Bathrooms on a budget: under $50/£50
Yep, we said budget and we mean it. All the ideas in this section are incredibly affordable and most of them are super quick updates or little DIY jobs to anyone could do. That makes them fast as well as cheap. We approve.
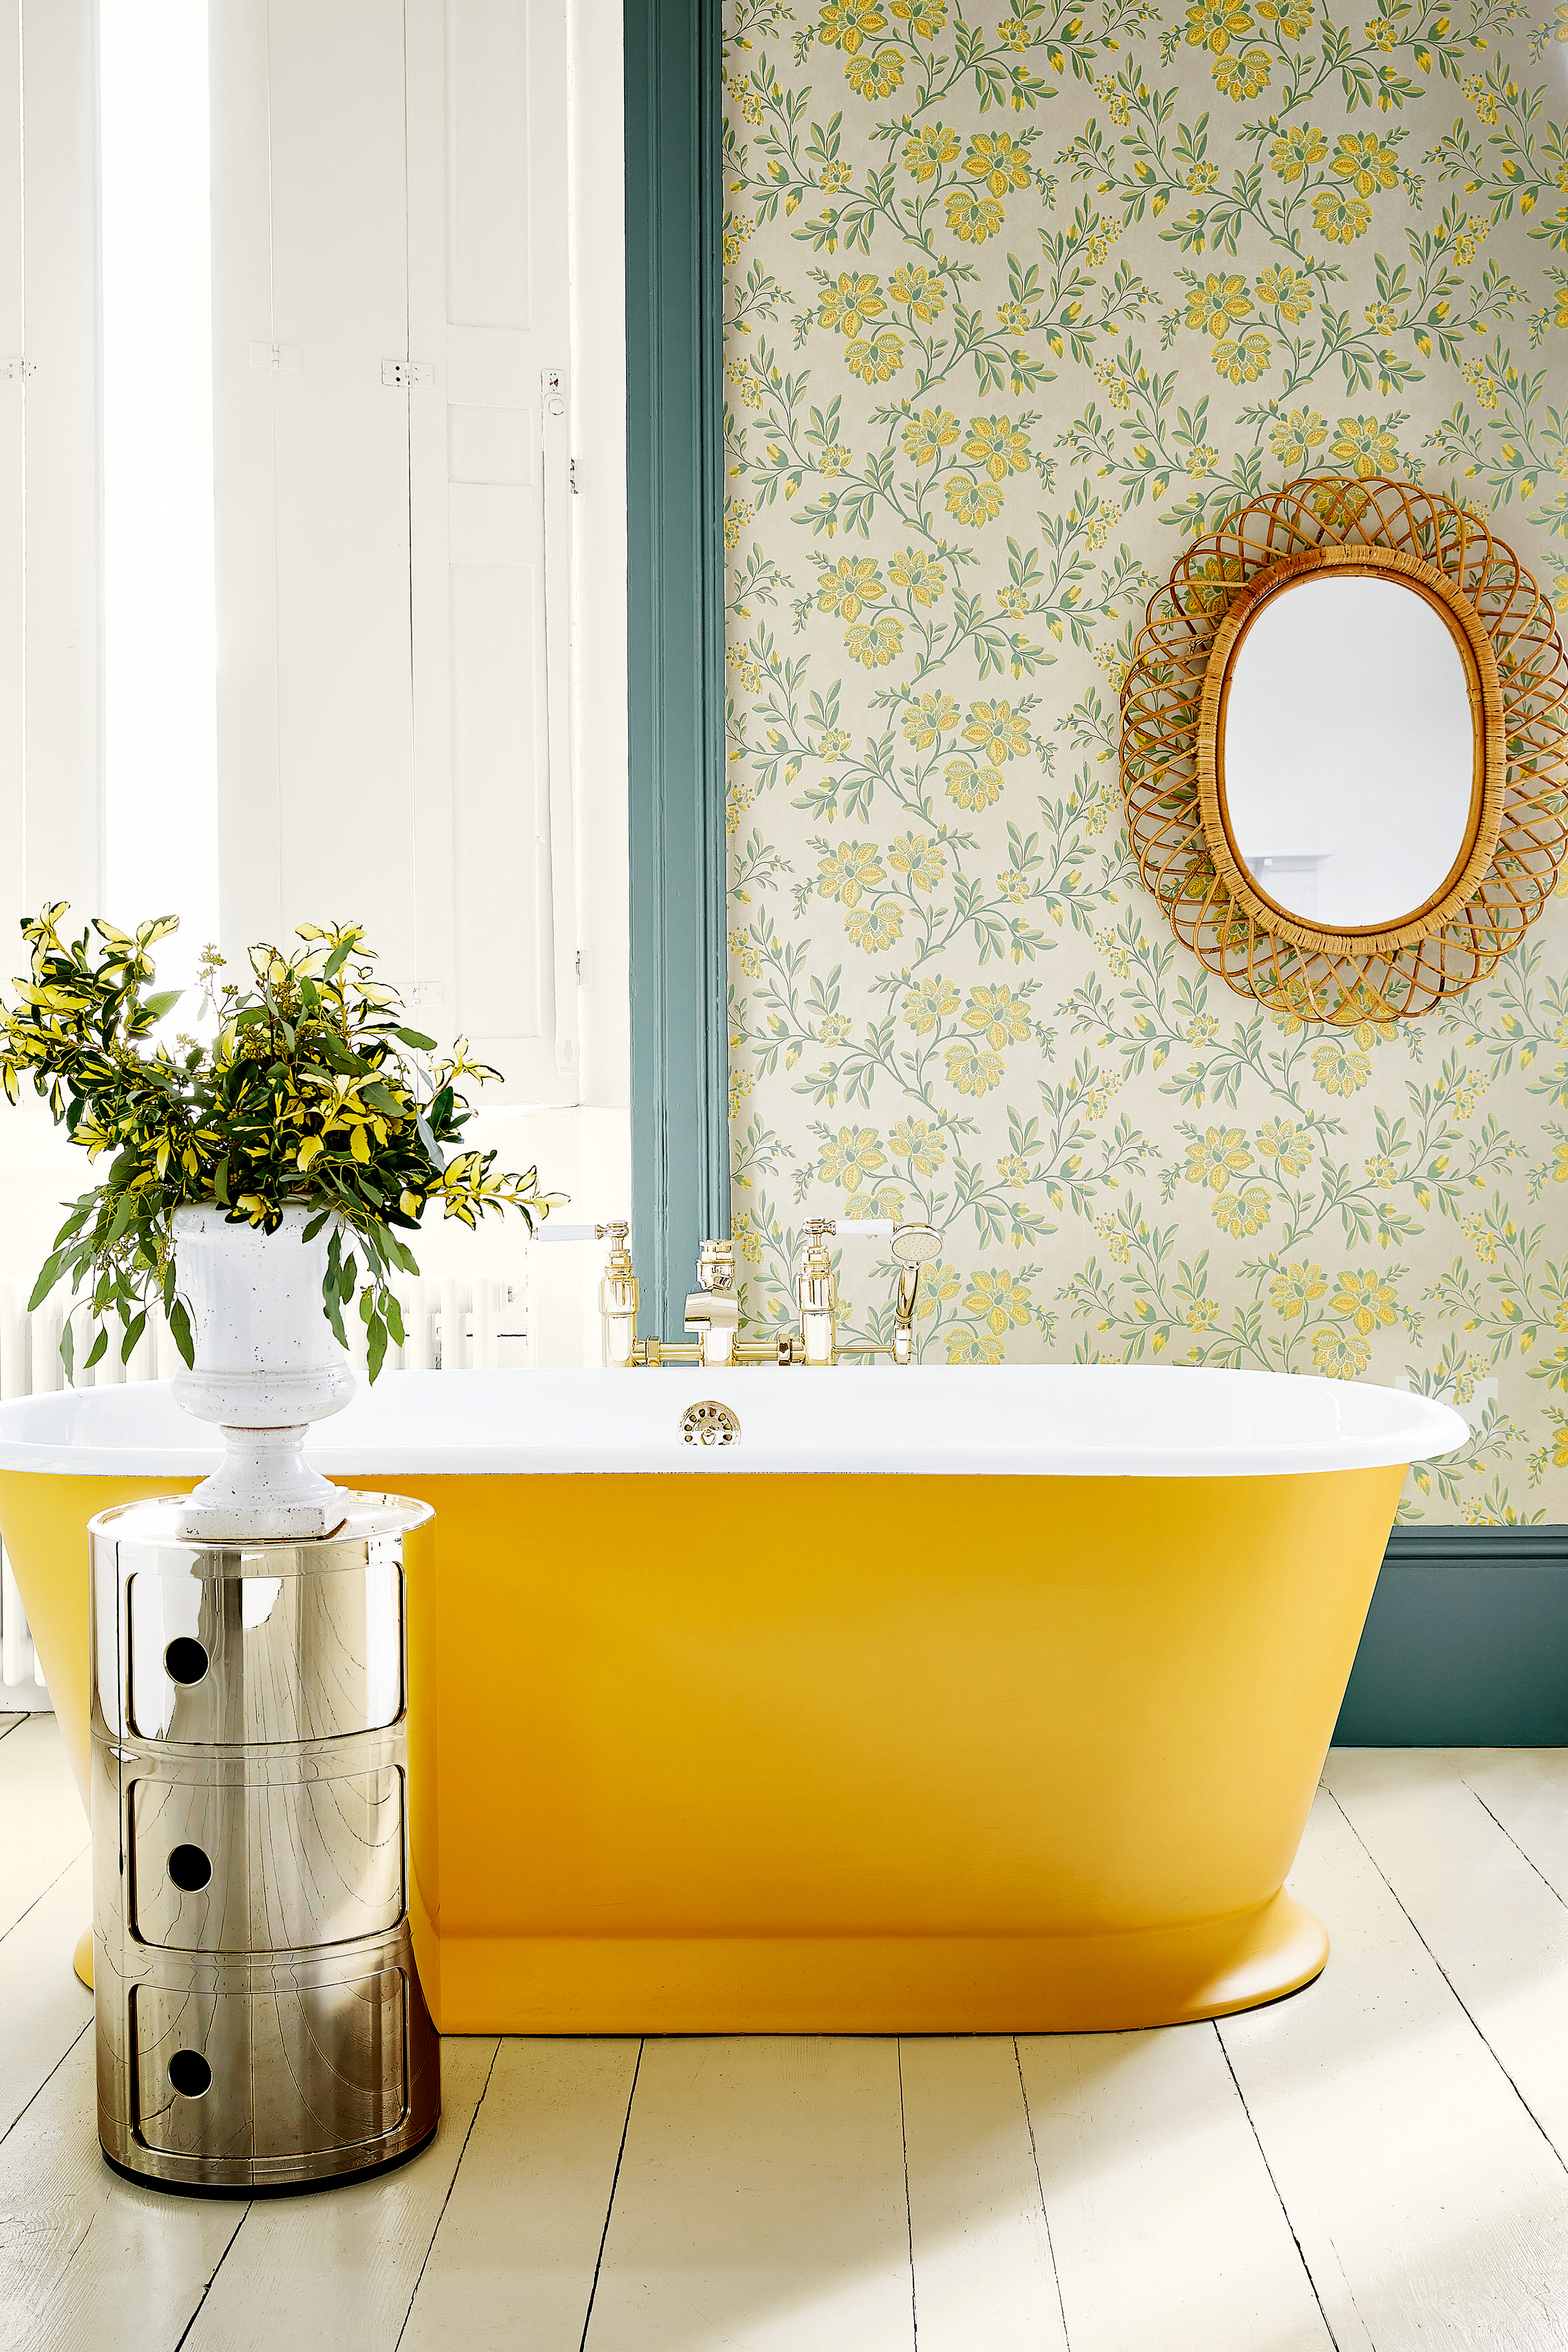
1. Use online marketplaces for materials and go DIY
(Image credit: @Homewithhelenandco)
There's nothing like the satisfaction of undertaking a little bit of DIY. Yes, it can be messy and take significantly longer than if you got the professionals in, but there's a lot to be said about person who can apply themselves to an interior challenge.
Plus, there's also the obvious benefit of cost-saving on labor and a few smug brownie points to be had when guests compliment your bathroom too.
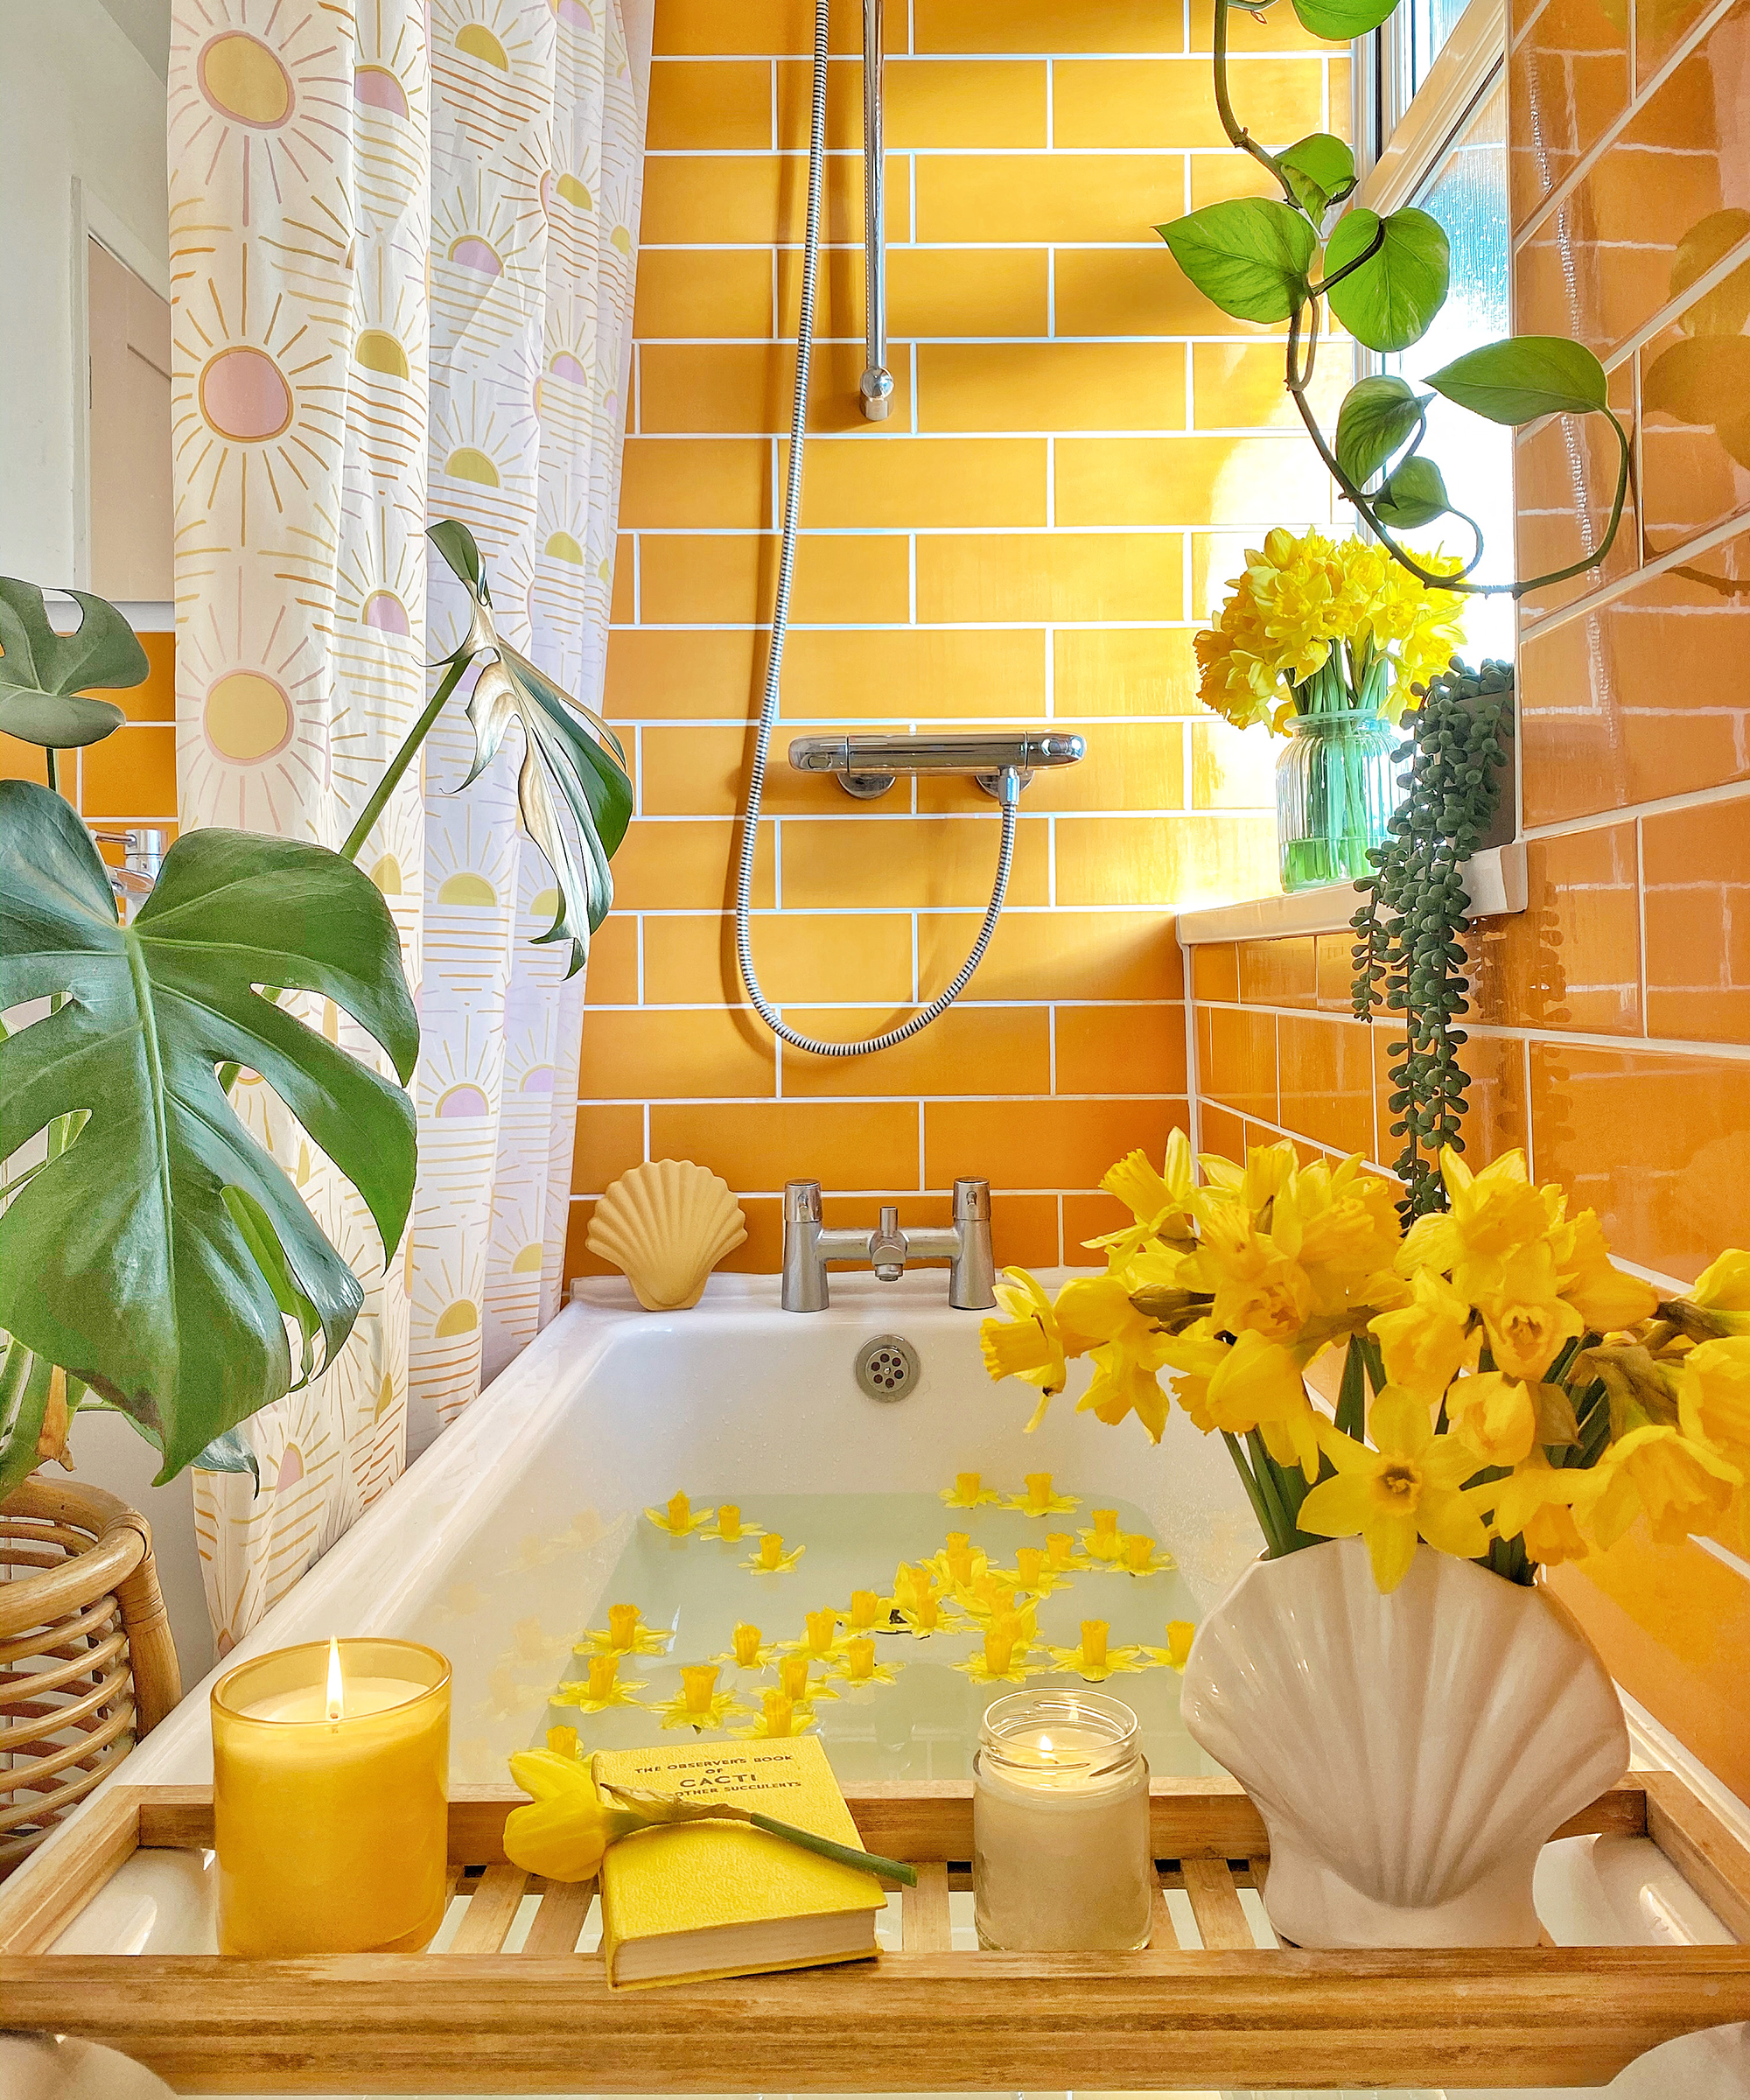
This yellow bathroom idea by home renovator @homewithhelenandco uses daffodils to give a bit of springtime style to her bath and shower.
She says: 'I've mentioned before that I tiled the bathroom myself.
'My most asked question is where the tiles are from. I just searched for orange subway tiles on Ebay (yep, they're orange, not yellow) watched a couple of videos and went for it.'
'If you're thinking of wallpapering or tiling for the first time, YouTube is invaluable and just take your time. This took me weeks to finish.'
While your own labor is free and the cost of watching online videos is included in your internet package, auction-based e-commerce sites can be a minefield if you don't know what you're doing.
The cost of metro tiles will ultimately depend on how they're sold (per piece or by the box), but we've seen boxes go for as little as £23/£17 per square metre.
Be sure to haggle where you can, know your spending limits and even try searching using misspelled words. Bidding using an uneven amount can make all the difference too.
2. Start with a pot of paint
(Image credit: Annie Sloan)
From beautiful neutral beige, to dark and daring black and navy hues, painting your walls is top of our list when it comes to updating your bathroom decor. And there are many budget bathroom ideas that make the execution both easy and stylish.
Don't just think about painting your walls one single shade. Instead, explore different bathroom paint ideas that experiment with placement, paint types, textures and techniques. For example, whilst chalk paint can add a rustic look your bathroom, a floral stencil can add pretty country details to your bathroom decor.
To keep this budget bathroom decor low-cost and minimal on maintenance, the best paint for bathrooms will be moisture and steam resistant, washable and is a formulation that protects the emulsion from mold - something we commonly see in damp areas like the bathroom. Some time-saving variants will be quick-drying and require no undercoat.
Lastly, opt for a low odor paint where possible, and keep the room ventilated.
3. Swap expensive flooring for affordable alternatives
(Image credit: Carpetright)
If you're a fan of tiling, but don't have the DIY expertise or can't foot the financial bill, then luxury vinyl tiling (or LVT) is one of the best water-resistant budget bathroom ideas to consider.
A long shot away from its formerly fashionable, but now outdated lino cousin, this modern bathroom idea imitates more high-end flooring options is accessible choice for homeowners and renters alike. Prices start from a very purse-friendly $2.72/£1.95 per square foot.
What's more, cleaning vinyl flooring is low maintenance too. Using one cupboard staple, you can get this flooring solution gleaming in no time!
4. Upcycle old bathroom furniture
(Image credit: Annie Sloan)
If you have tired, lackluster units that are in need of a bit of TLC - don't throw them away. Across social media sites like Pinterest and Instagram, upcycling old furniture is one of the top trending budget bathroom ideas.
Plus, if you haven't got vanity units that need revamping, Facebook Marketplace, Ebay and Gumtree are great go-tos for where to find secondhand furniture.
5. Fake tiling with adhesive wall and floor solutions
(Image credit: Brewster Home Fashions)
As the saying goes, time is money, so who wants to spend countless hours doing DIY during their free time? (Unless you enjoy it of course!)
Instead of spending precious time mixing gloppy wallpaper paste, cutting tile after tile and cleaning tile dust off your surfaces, wing it with peel and stick wallpaper and adhesive wall and floor tile solutions.
These sticky solutions aren't tricky! In fact, they are one of many simple bathroom ideas that mimic premium bathroom wallpaper decor.
So get peeling and sticking for as little as $1.44/£1 per square foot.
6. De-clutter your space like an interiors expert
(Image credit: Christy England)
One of our most cost-effective budget bathroom ideas, this trendy tip requires no special equipment or designated spend. Simply tidy your bathroom by either stowing away lesser used products or by binning cosmetics, lotions, gels and ointments that are past their expiry date.
But if you're wondering how to determine what goes into the trash can, take a look at the back of your packaging and look for a tub icon. This will indicate how many months the product should be kept for after opening. So off you go - tidy up like Marie Kondo!
And if you're reluctant to get rid of your haul, creating DIY bathroom shelving or a ladder using reclaimed wood is a budget-friendly and thrifty idea. Dollar stores will also stock drawer dividers and other cheap ways to efficiently organize your space.
7. Paint a bathroom ceiling anything but white
(Image credit: Dulux)
Painted ceilings are a massive trend at the moment and are a really great way to add interest to a space, especially a smaller space like a bathroom. If you are a keen DIYer and want to give this a go yourself, just check out our guide to painting a ceiling.
If you're feeling brave and want to copy this gothic look, we recommend going for a combo of Farrow & Ball Down Pipe and Railings, and investing in good bathroom lighting. Designing a bathroom from scratch? Head over to our feature for an in depth guide.
8. Paint a bathroom floor for a quick and affordable update
Painting floorboards has also become a bit of a trend, so if you have floorboards in your bathroom, consider this as a cheap but chic bathroom update. You'll need to use wood paint, but if you can, use a paint designed for floors as it will be more durable and less slippery – if more limited in color choices.
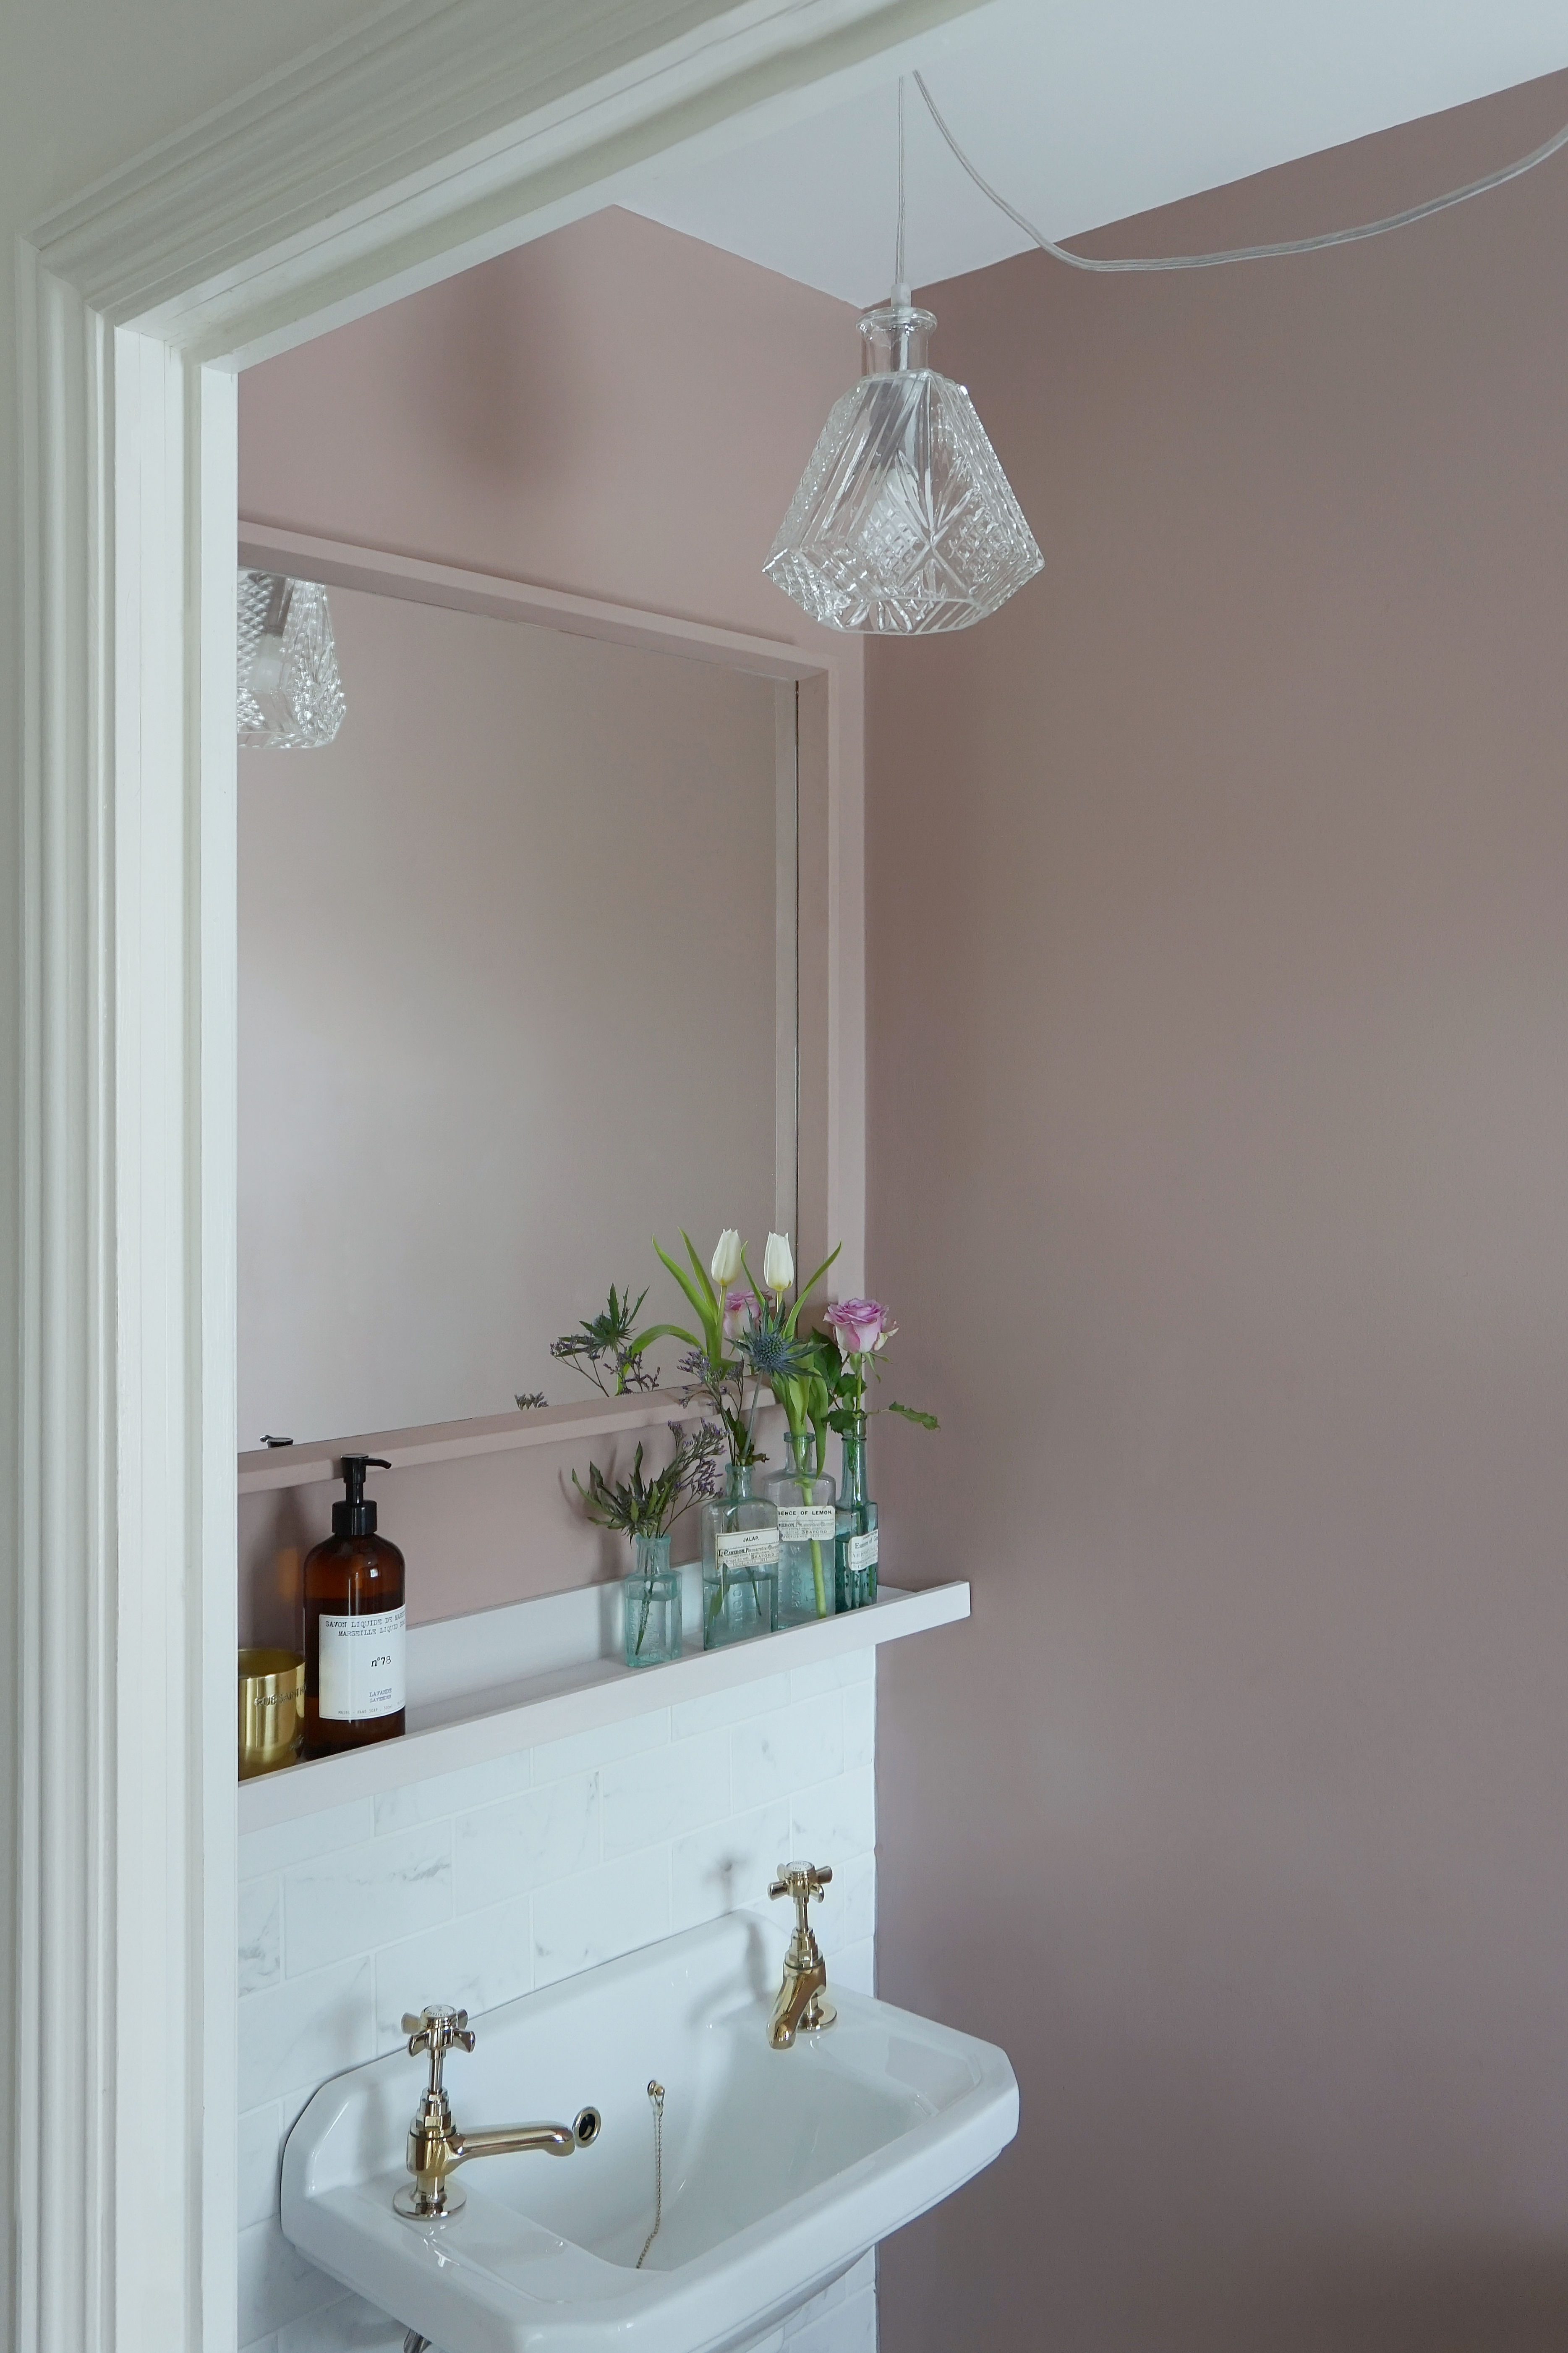
9. Or paint bathroom walls an unexpected shade
(Image credit: Cult Furniture )
There are few cheaper and easier ways to update a space than by giving it a new lick of paint. Pink room ideas are among our favorites at the moment, and softer shades are a space-enhancing choice for a small room. So if you are looking for an on trend bathroom update, we say go for a rosy hue. Something like Farrow & Ball's Sulking Room Pink, which despite the name is actually a really grown-up take on the color, would be our fave choice.
10. Paint your bathroom tiles
(Image credit: Ikea)
If you don't want the expense (and mess!) of taking down bathroom tiles and starting all over again, consider painting over your bathroom tiles. This is a relatively quick and cheap bathroom tile idea for bathrooms on budget.
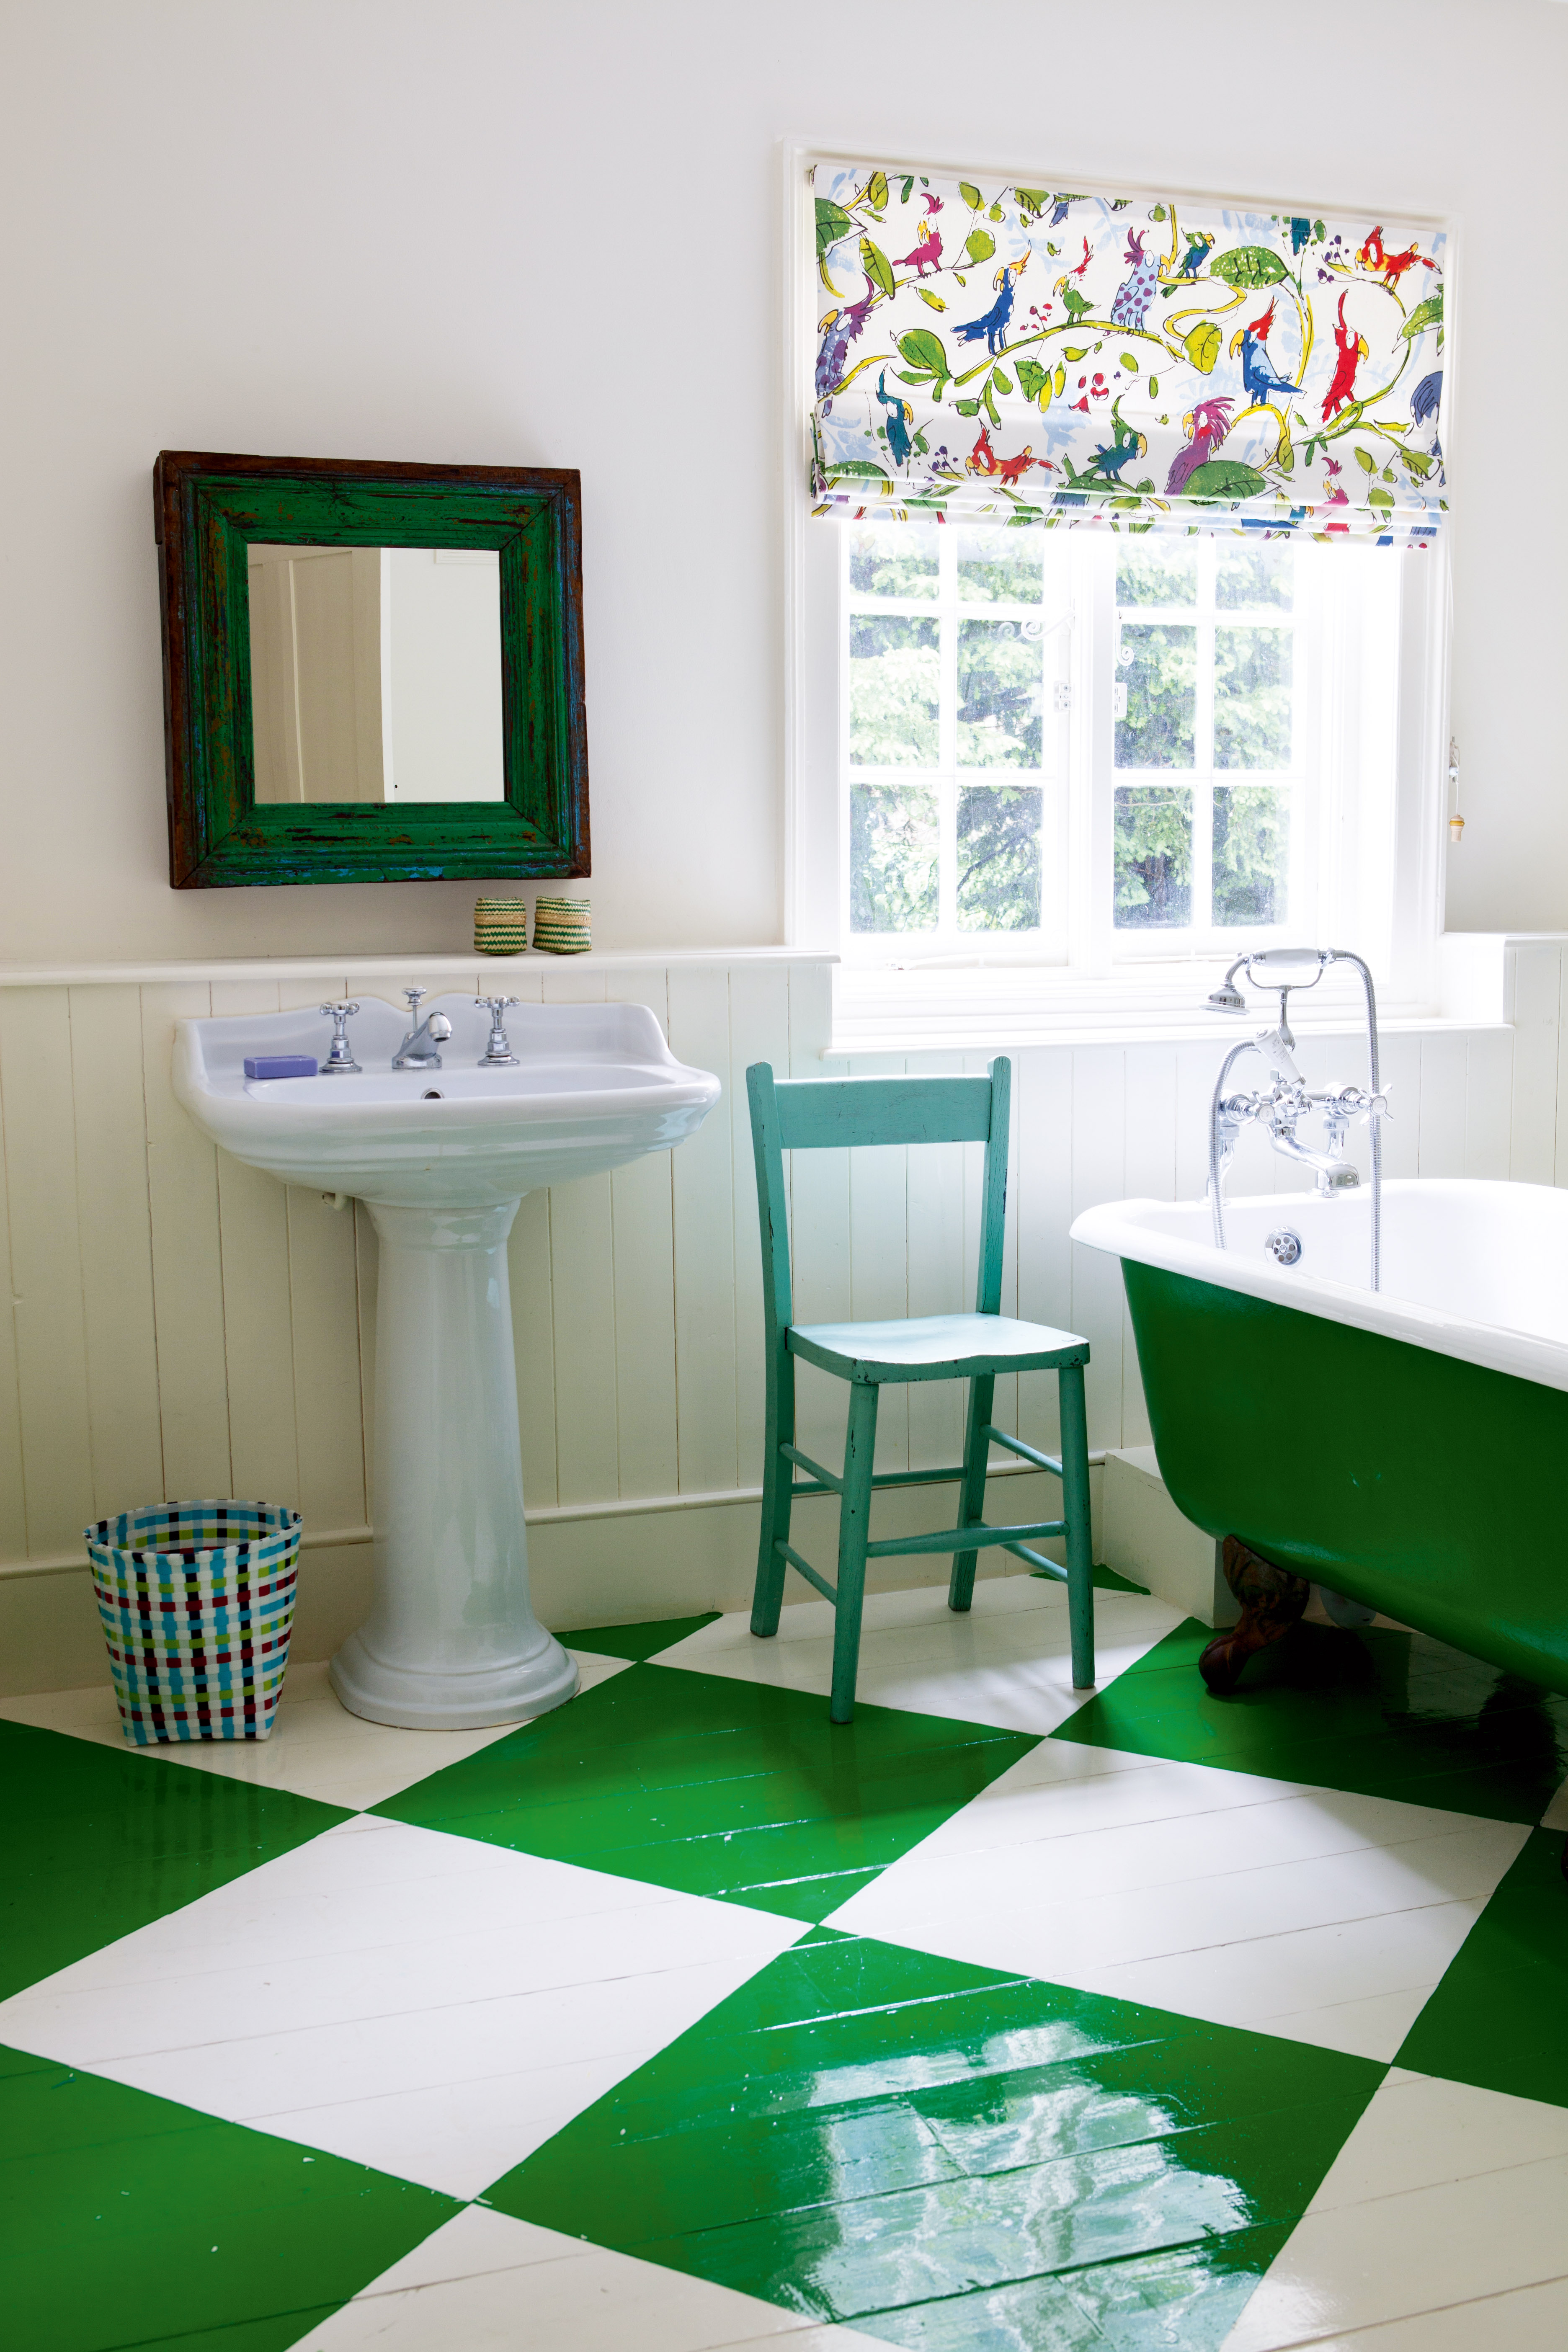
Whether you want to paint your tiles one color, or create a gradient ombre finish, a pot of paint goes a long way to achieving a luxury bathroom design for less.
Most tile paint only needs one coat, but with its high VOC content, be sure to keep it out of reach of children and keep the room well-ventilated to extract the fumes from this solvent-based solution.
It's also worth noting that gleaming grouting goes a long way, so make you know how to clean tile grout correctly to ensure to remove any grubby gunk.
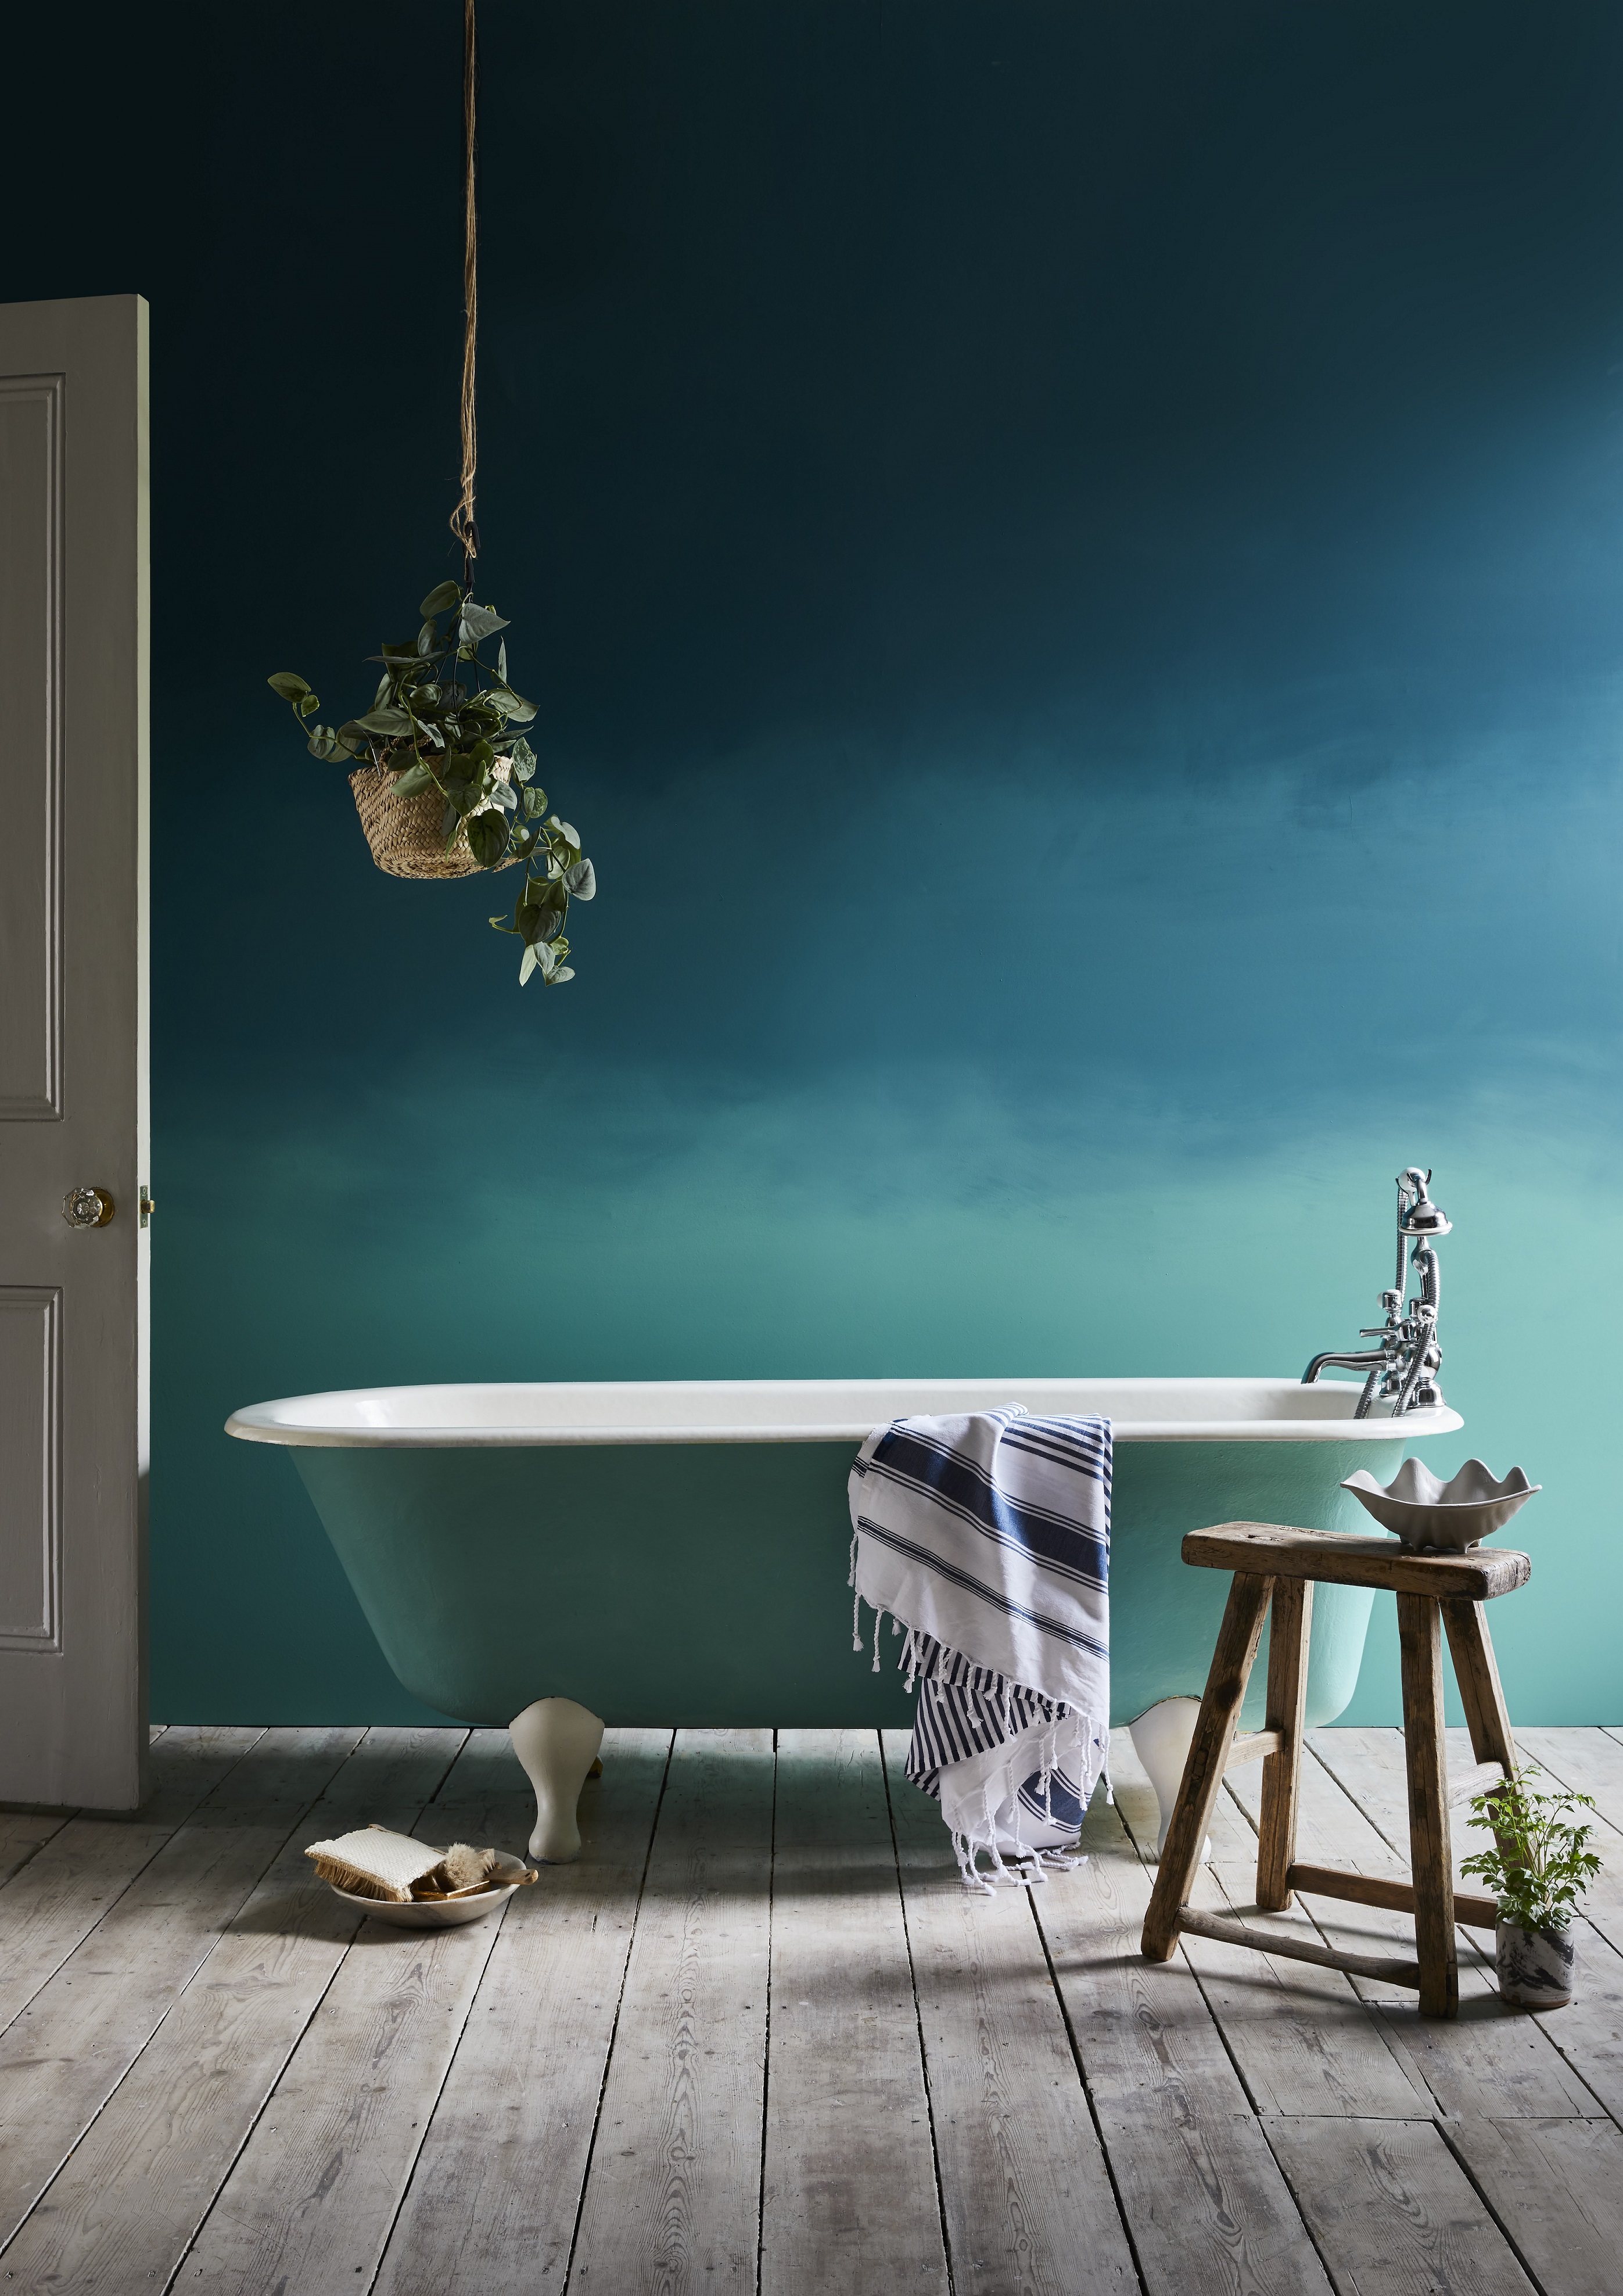
11. Create an ombré paint effect
(Image credit: Annie Sloan)
Experimenting with on-trend paint ideas is an easy and affordable way of creating a new vibe in a tired looking space. Copy this idea and pick two or three shades of varying tones (we'd recommend blues for a bathroom) and create a stylish finish with the help of our guide to painting an ombré accent wall.
12. Experiment with bathroom wallpaper
(Image credit: Drummonds)
Bathrooms and wallpaper? Surely that's not a good mix? Well, actually, it can work if you just follow a few extra steps when choosing and hanging your wallpaper. First, don't hang wallpaper anywhere that will be in constant contact with water – and if your bathroom isn't really well ventilated we would recommend sticking to wallpaper specifically designed for bathrooms. Otherwise, you can use any wallpaper you like, but make sure you use extra strong wallpaper adhesive; a layer of clear varnish can help protect it further.
13. Invest in stylish bathroom storage to make more space
(Image credit: katie lee)
Obviously, shelves are a good bathroom storage solution, but make them both practical and stylish by choosing open shelving that you could also make a bit of a feature of. Use them to store your essentials, your soaps, cotton wool, floss and whatnot (stick them in some pretty glass jars if you want), but also mix in some more decorative pieces like candles, house plants and cute folded towels.
Get some more tips of how to style shelves in our dedicated feature.
14. Update towels – and how you store them
(Image credit: Dunelm)
Literally the cheapest way to update your bathroom is to get yourself a few new towels. Also think about mixing up the way you store them. You didn't spend money on new towels to fold them away in a cupboard, so get your fancy new towels out on show! Something like a gorgeously simple wooden ladder would be perfect.
15. Add simple bathroom accessories for a fresh feel
(Image credit: Sheridan)
A quick, inexpensive (and often practical) way of updating your bathroom is with accessories. We are talking, soap dispensers, toothbrush holders, caddies, storage jars, all the fun stuff. Look out for cheap bathroom accessories when you next do your food shop; places like Asda, Tesco and Sainsbury's all have really lovely and super affordable pieces.
16. Brighten and enlargen a bathroom with a mirror
(Image credit: Fritz Fryer)
It's interior design 101 that mirrors can add a ton of space and light to a room, which is obviously going to make your bathroom feel fresher. So, you know what we are going to say: buy a new bathroom mirror. Go as large as your space can handle to bounce as much light around as possible.
Have we persuaded you to invest? We've rounded up the best bathroom mirrors in our buying guide, so go and have a scroll through those.
17. Decorate with tile stickers
(Image credit: Drummonds)
We only recently discovered the life-changing properties of tile stickers. They mostly come in at under a tenner a pack and you can use them pretty much anywhere. Look out for ones that are water-resistant (most of them are), and you can stick them over the existing tiles in your shower to recreate this look – no messy grout or expensive patterned tiles needed.
(Image credit: Simon Whitmore)
Oooooh look you can use them on the floor too! Check out Dunelm's selection for similar tile stickers to the ones below.
18. Get rid of grime in between your wall tiles
(Image credit: Original Style)
Want to update your bathroom tile for free?* Well, almost. Then learn how to clean tile grout like a pro. All you need is a toothbrush, a good cream cleaner and a little bit of elbow grease. By getting rid of dirt and debris in between your grout, you'll instantly brighten up your bathroom walls.
Get the paste into all the nooks and crannies and then leave for about 30 minutes to let it work its magic. Once you've left it for a while, simply rinse off with clean water and wipe up any residue with a microfibre towel.
Top tip: Baking soda and vinegar mixed makes for a great natural cream cleaner that will leave your grout sparkling. We actually have a whole feature on natural cleaning hacks, so make sure you go and check that out too.
But if the stains still remain, an affordable grout pen should do the trick once and for all.
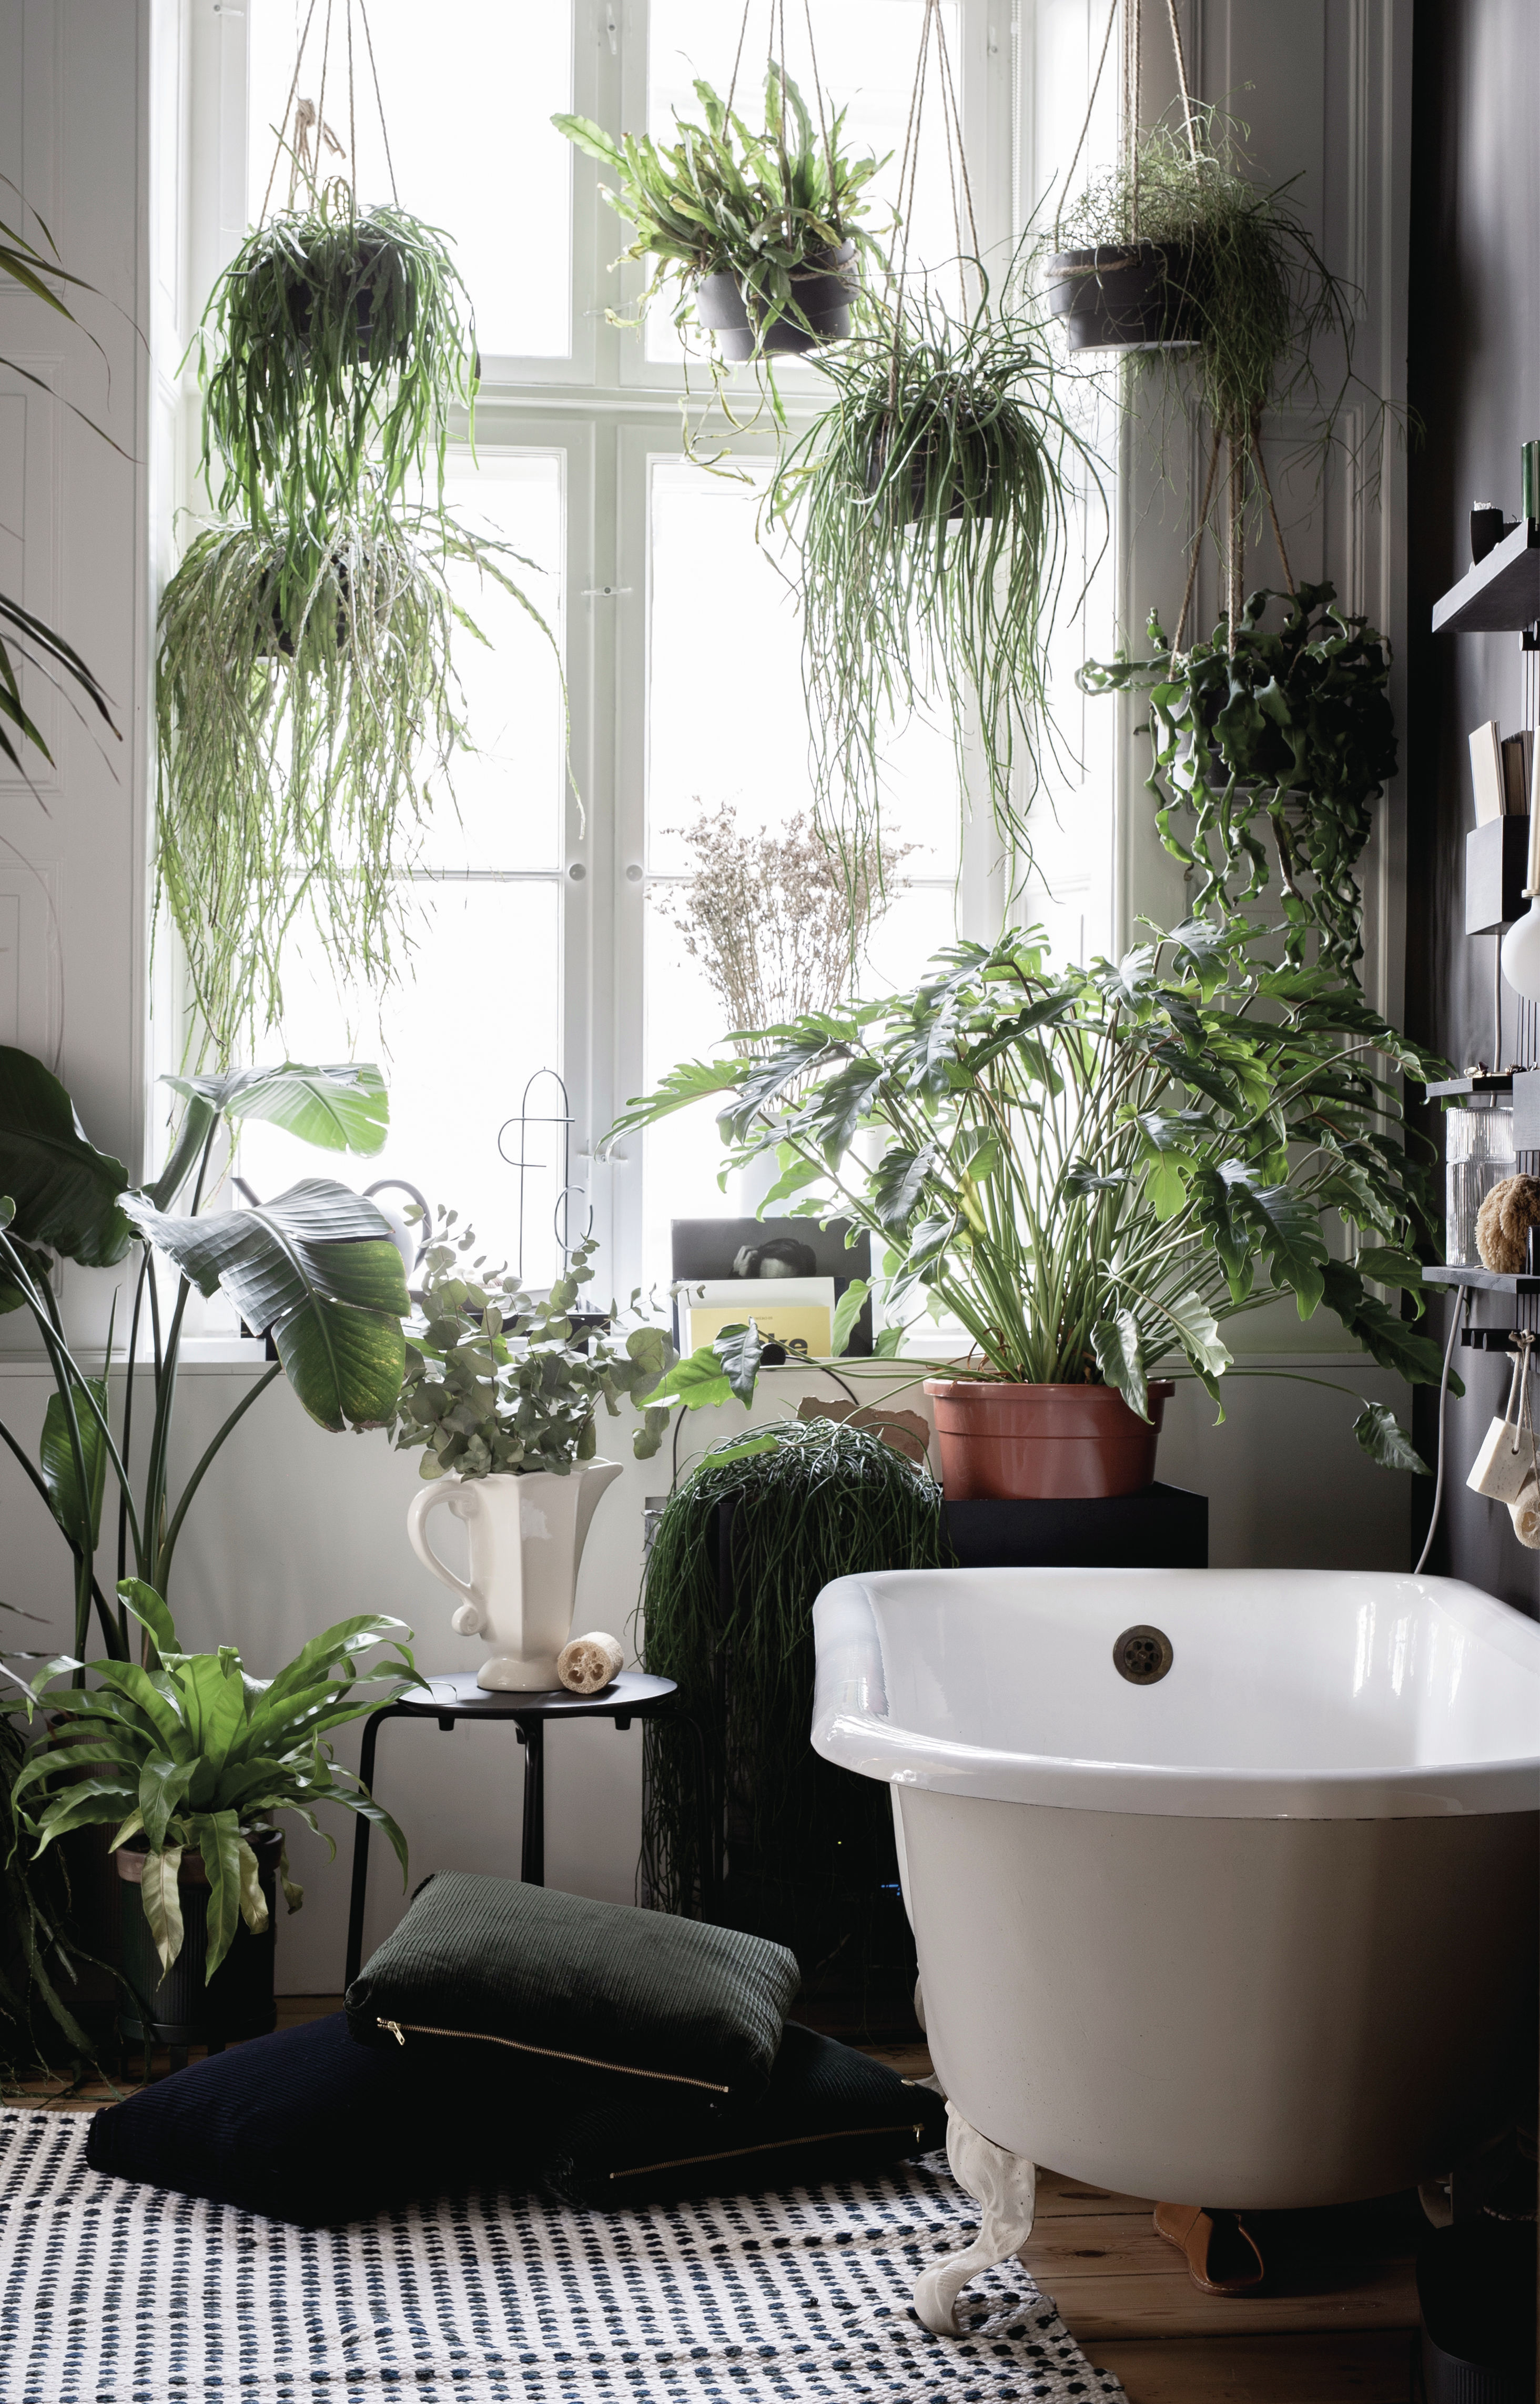
19. Fill your bathroom with house plants
(Image credit: Nest)
Bang on the biophillic trend, adding air purifying plants to your scheme is a budget bathroom idea that will bring the outdoors in and detox your space. From increasing productivity and boosting your mood, the health benefits of houseplants just keeps growing and growing.
From handmade macrame hangers to ceramic pots, DIY plant shelves and living walls, there are endless ways to style your plant babies.
Be sure to choose high-humidity bathroom plants that will thrive in this space. Some hardier varieties simply need a regular mist or spray of water to keep them hydrated, but set your alarms to ensure they don't die from dehydration.
Top tip: If your bathroom is windowless, we recommend opting for fake plants. You'll find a load of fake (and real) options in our round up of the best indoor plants.
20. Switch up your shower curtain
(Image credit: H&M)
Throw away that yellowing, ever so slightly mouldy shower curtain. Go on, do it now. And get yourself a gorgeous shiny new one. H&M Home have a huge selection, each one as gorgeous as the next (we literally couldn't decide on a favourite). Plus, they start from as little as $10/£9.
21. Hang a gallery wall
(Image credit: Waters Baths of Ashbourne)
Treating your bathroom decor and styling like you would that of your living room or bedroom is one of the quickest shortcuts you can take to giving it a bold new look. Hanging a gallery wall is one way to do this – and you needn't even spend to get this finish; simply repurpose pictures you're not using or want to swap out from other rooms.
Bathrooms on a budget: under $100/£100
So, you've got a bit more of a budget to spend on your bathroom, but still want to keep your spend under 100? Here are some ideas that will have more of an impact, but still won't break the bank...
22. Illuminate your bathroom with inexpensive lighting
(Image credit: Leader floors)
As budget bathroom ideas go, lighting is one of the brightest ways to make your suite look expensive. From sophisticated wall lights to stunning ceiling chandeliers, statement pendants and modern lampshades, let you space shine with these fittings and fixtures.
As well as shining a light on the bathroom lighting ideas, be sure not to overlook bulb sizes and light color temperatures too. While cool light is generally considered better for tasks such as applying makeup, you'll want warm light for creating a calm and tranquil bathtime atmosphere.
But, as we know, water and electricity do not mix well. So ensure you put safety first by consider bathroom lighting zones and IP (Ingress Protection) ratings. Put simply, these ratings will determine how well the electrical enclosures are sealed away from moisture, dirt and debris which can be a health hazard.
23. Wow with window treatments
(Image credit: 247 Blinds)
From cut-price curtains, to discount drapes, low-cost window films and bargain blinds, there are loads of bathroom window treatment ideas that can add privacy and style to your decor.
What's more, many of today's modern materials can block UV rays, offer customized levels of light and keep the room cool by blocking out the sun's heat. But rather than going straight to the leading manufacturer, it pays to shop around.
When working out how to measure up for curtains, making sure you get your measurements correct is absolutely essential. Fittings that fit flush to your window space and look bespoke will make the space appear more expensive.
Once you've chosen your material, another way to save with this budget bathroom decor is by fitting the window treatment yourself. Ensuring you know how to put up a curtain pole is just one step towards a successful project.
24. Upgrade your shower head
(Image credit: Big Bathroom Shop )
Changing your shower fitting is one of the more budget bathroom ideas when upgrading your bathing facilities.
Opulent finishes like brass can quickly turn your bathroom into an expensive-looking haven. Just be sure to keep abreast of the advice on how to clean brass to ensure this luxe look stays well-maintained.
And as technology and the demand for creative options grow, you're literally showered with options. Choose from a fixed or handheld shower head and even fixtures with jet or spray options for a sensual spa bathroom experience.
25. Swap time-consuming tiling for a sheet wall covering
(Image credit: Showerwall / Victorian Plumbing)
We're sure you can agree that dodgy DIY tiling or cowboy builders cost a small fortune are a stress that absolutely NO ONE needs in their life when updating their bathroom.
So instead of running the risk of botched bathroom tile ideas, why not invest in a sheet wall covering that you can install yourself? These large decorative wall panes come in various material types including marble and natural stone for a luxurious look at a lower cost price.
26. Buy some new pieces of bathroom furniture
(Image credit: Barker & Stonehouse)
We aren't talking a new bath here, or even a new sink – something like a side table or a new statement stool will do. Look for pieces that aren't necessarily made for bathrooms that will add more interest to your space. We love these rustic wooden stools from Etsy, which could actually be pretty practical for chucking towels over or keeping things handy near the bath.
The gorgeous little cabinet in the bathroom below is definitely on our lust list and you can find something similar at Graham and Green.
27. DIY a stylish bath panel
(Image credit: Thisenglishhome)
The queen of amazing DIYs @thisenglishhome totally transformed her bathroom by making a new cane bath panel on a budget. You can find all the step by steps you need over on Victoria's Instagram, just check out the Bathroom highlight for everything you need to know to recreate this look.
28. Put up some wallpaper for a cheap bathroom update
(Image credit: Little Greene)
Just like paint, a single roll of wallpaper can make all the difference to a space. If you have a large bathroom that is well ventilated, you could get away with using any wallpaper, but we recommend looking out for those suited to high-moisture rooms that are labelled 'extra washable' or 'highly wash-resistant'.
29. Upgrade your bathroom lighting
(Image credit: Orginial BTC)
Bathroom lighting can make or break a room so switching it up could be all your space needs to make it feel brand new(ish). Get rid of any harsh overhead lighting you might have and replace it with softer shade or, if you have the budget, add some warm wall lights that could completely change the vibe of your room.
30. Paint your bath panel
(Image credit: Genie)
Revamping a plain white tub with a bright bath panel is easy to do and a quick way to refresh a tired-looking scheme, injecting a bit of pattern and colour. Think you can't DIY this look for under $100? Think again. Just head over to our guide for how to DIY a bath panel for everything you need to know.
Bathrooms on a budget: under $500/£500
Still not blowing all your budget, but if you've got a touch more to spend on your space, here are some affordable ideas that still come in at under 500...
31. Choose bespoke bathroom pieces
(Image credit: Neptune)
Opting for unique or bespoke pieces can be a great way of adding character into a bathroom. If you're an experienced DIY-er, consider customising pieces you have already got; we love the idea of turning a cabinet into a washstand and it's much more straightforward than you might think. Simply cut out a hole where the basin should be – most come with a template.
If you are on the hunt for a vanity unit, we have load of inspiration over in our ideas gallery.
32. Or trawl online marketplaces for one off finds
(Image credit: Jody Stewart)
Buying a whole new bathroom might not quite be in your budget, but you'd be surprised what cool pieces you can find second hand. We know, you are probably thinking, 'Err... I don't want anyone's second hand toilet, thanks'. But how about a reclaimed freestanding bathtub with ball and claw feet? Or a vintage Victorian sink? A hand-me-down bathroom doesn't sound so gross now does it? Keep an eye on sites like eBay and Etsy for these kind of unique pieces.
33. Buy an ex-display or sale suite
(Image credit: Mereway Kitchens & Bathrooms)
A great tip to help you control your budget is to buy ex-display bathroom hardware. More often than not, these items are do not carry any cosmetic defaults - they are simply surplus stock or end-of-range items from the store.
While in some cases you're still covered until the brand's guarantee or warranty, it's worth double checking with the store you purchased the goods from.
Make sure to keep hold of any receipts and documentation to manage your expectations on what can be refunded or exchanged as the terms may differ from 'normal' policy.
34. Replace your bathroom fittings
(Image credit: Chris Snook)
If your bathroom fittings – taps, showerheads and the like – are looking a bit worse for wear, maybe it's time to get them replaced. They aren't really something you notice until you change them up and realise you've put up with that gross showerhead for way too long. Black fixtures are bang on trend at the moment and there are loads of affordable options out there (check out this one from Victoria Plum ). Or, for an equally trendy but slightly warmer look, try bronze or copper fixtures.
35. Update your bathroom with wall paneling
(Image credit: Graham & Green)
Wall panelling is a more affordable alternative to wall tiles, especially if you can fit it yourself, which most experienced DIYers would be able to do. Just be aware when using paneling in bathrooms that although, MDF designs painted with an oil-based finish are water-resistant, they shouldn't be used where they will be soaked.
How can I modernize my bathroom cheaply?
1. Work with the bathroom you have got
The first rule of renovating any room on a budget is to salvage whatever you can from the current design. This could potentially save you £££s in replacing items that are serviceable but just need a little TLC. However, don't keep something if it will have a cost impact in another way. For example, it might be cheaper to replace a whole bathroom suite than try to find replacements to match one another.
The most important thing though is to try to maintain the existing plumbing layout if possible. Keep the waste and water inlets as they are and try to place sanitaryware accordingly to keep plumbing costs down. Acquainting yourself with the rudiments of bathroom plumbing can help you make the right choices for your budget, too.
2. Take on bathroom renovation work yourself
Take on DIY tasks that you feel confident with, but leave anything that involves the cutting or adjustment of expensive materials to a professional.
3. Choose sanitaryware on a budget
Other than shopping around online or waiting for sales, what can you to do maximise savings on sanitaryware?
When it comes to choosing bathroom sinks, a pedestal model or wash-stand, which has legs, is usually less expensive than a vanity unit or cabinet and makes a striking standalone piece. If you need more storage space than this type of sink can offer, add simple shelves to an alcove and supplement with smaller bathroom storage solutions such as baskets, caddies and hooks.
To make savings, you may be tempted to mix and match sanitaryware from different brands. This can work where styles are similar, but do check the colours very closely, as not all whites are the same. This also goes for adding a pristine new item into an existing, slightly aging suite.
If you are buying the fittings for your builder to install, before purchasing double check the practical matters, such as changing an old-fashioned high-level cistern over to one that is close coupled, or if the position of bathroom taps and/or waste is due to change. Moving taps and waste pipes will involve extra work and expense.